


Search results
177 results
177 results
Search results


Functional Trainer Assembly & Installation
Professional assembly for eligible equipment purchased directly from 247 Gym Equipment, completed by experienced gym-equipment assembly technicians.
Professional Assembly of One Eligible Unit
The $550 fee covers the assembly and setup of one eligible functional trainer under this service.
Shipping and delivery are not included and are calculated separately.
The $550 assembly fee is for assembly only. Shipping, freight and delivery charges are calculated separately based on the delivery address, order size, weight and access requirements.
For current shipping rates, pallet / wooden crate delivery conditions, interstate depot pickup, tailgate requirements and delivery surcharges, please see our Shipping & Delivery page.
View Shipping & Delivery Information →What’s Included
- Professional Assembly: Assembly and setup of one eligible functional trainer.
- Component Installation: Cables, pulleys, weight stacks and supplied attachments fitted where applicable.
- Alignment & Function Check: Moving parts are checked for correct alignment and normal operation before completion.
- Final Safety Check: A final visual and operational check is completed after assembly.
- Experienced Installers: Work is coordinated through approved third-party technicians experienced in gym-equipment assembly.
The installation area must be clean, clear and ready for assembly before the installer arrives. Please remove vehicles, furniture, boxes, existing gym equipment and other items that may obstruct access or the assembly area.
Moving heavy items, relocating existing equipment, clearing the work area or other additional preparation is not included in the standard $550 assembly fee.
If the installer is required to move heavy items or spend additional time preparing the area, additional labour charges may apply. If you need help moving equipment or other heavy items, please advise 247 Gym Equipment before the installation date so we can confirm whether it can be accommodated and advise you of any additional cost.
Installation Access & Requirements
Please contact us before the installation date. Advance notice helps us allocate the correct time and labour and avoids unexpected delays or additional charges on the day.
What’s Not Included
- Shipping, freight or delivery charges.
- Moving heavy furniture, vehicles, existing gym equipment or other large items unless arranged in advance.
- Clearing or preparing an installation area that was not ready on arrival.
- Additional labour caused by undisclosed stairs, lifts, long carries, difficult access or restricted entry.
- Gym flooring installation unless separately quoted.
- Electrical work, wall mounting or structural work.
- Floor anchoring or bolting unless specifically agreed in advance.
- Removal of existing gym equipment.
- Pallet / wooden crate or bulk packaging disposal unless specifically included or agreed in advance.
- Assembly of third-party equipment not purchased from 247 Gym Equipment.
Other Assembly Services
We offer different assembly services depending on the equipment type and complexity. If this is not the correct service for your order, please view our other assembly options or contact us before purchasing.
Frequently Asked Questions
No. The $550 fee covers assembly only. Shipping and delivery are charged separately. Please see our Shipping & Delivery page for current freight options, depot pickup information and delivery conditions. Please make sure the installation area is clean, clear and ready for assembly. Remove vehicles, furniture, boxes, existing gym equipment and other obstacles before the scheduled appointment. Moving heavy items or preparing the installation area is not included in the standard assembly fee. If additional labour or time is required, an extra charge may apply. Please tell us in advance if you need assistance so we can confirm availability and pricing before the appointment. Please contact us before booking. Stairs, lifts, basements, narrow entrances, long carrying distances and other restricted access may require additional labour or a different service arrangement. No. Gym flooring installation is separate and must be quoted or booked independently. No. This assembly service is available only for eligible equipment purchased directly from 247 Gym Equipment. Assembly is coordinated through approved third-party technicians experienced in gym-equipment assembly. Assembly time varies depending on the equipment, site access and installation conditions. Please ensure the work area is ready before arrival to help the installer complete the job efficiently.Does the $550 assembly fee include shipping or delivery?
What should I do before the installer arrives?
What happens if the installer has to move heavy items or clear the area?
What if my installation area has stairs, lift access or a long carry?
Does the assembly service include gym flooring?
Can you assemble equipment purchased from another company?
Who performs the assembly?
How long does assembly take?
Assembly availability is subject to location, installer availability and site access. Please contact 247 Gym Equipment before purchase if you are unsure whether this service is suitable for your order or installation location.

Functional Trainer Assembly & Installation
Professional assembly for eligible equipment purchased directly from 247 Gym Equipment, completed by experienced gym-equipment assembly technicians.
Professional Assembly of One Eligible Unit
The $700 fee covers the assembly and setup of one eligible functional trainer under this service.
Shipping and delivery are not included and are calculated separately.
The $700 assembly fee is for assembly only. Shipping, freight and delivery charges are calculated separately based on the delivery address, order size, weight and access requirements.
For current shipping rates, pallet / wooden crate delivery conditions, interstate depot pickup, tailgate requirements and delivery surcharges, please see our Shipping & Delivery page.
View Shipping & Delivery Information →What’s Included
- Professional Assembly: Assembly and setup of one eligible functional trainer.
- Component Installation: Cables, pulleys, weight stacks and supplied attachments fitted where applicable.
- Alignment & Function Check: Moving parts are checked for correct alignment and normal operation before completion.
- Final Safety Check: A final visual and operational check is completed after assembly.
- Experienced Installers: Work is coordinated through approved third-party technicians experienced in gym-equipment assembly.
The installation area must be clean, clear and ready for assembly before the installer arrives. Please remove vehicles, furniture, boxes, existing gym equipment and other items that may obstruct access or the assembly area.
Moving heavy items, relocating existing equipment, clearing the work area or other additional preparation is not included in the standard $700 assembly fee.
If the installer is required to move heavy items or spend additional time preparing the area, additional labour charges may apply. If you need help moving equipment or other heavy items, please advise 247 Gym Equipment before the installation date so we can confirm whether it can be accommodated and advise you of any additional cost.
Installation Access & Requirements
Please contact us before the installation date. Advance notice helps us allocate the correct time and labour and avoids unexpected delays or additional charges on the day.
What’s Not Included
- Shipping, freight or delivery charges.
- Moving heavy furniture, vehicles, existing gym equipment or other large items unless arranged in advance.
- Clearing or preparing an installation area that was not ready on arrival.
- Additional labour caused by undisclosed stairs, lifts, long carries, difficult access or restricted entry.
- Gym flooring installation unless separately quoted.
- Electrical work, wall mounting or structural work.
- Floor anchoring or bolting unless specifically agreed in advance.
- Removal of existing gym equipment.
- Pallet / wooden crate or bulk packaging disposal unless specifically included or agreed in advance.
- Assembly of third-party equipment not purchased from 247 Gym Equipment.
Other Assembly Services
We offer different assembly services depending on the equipment type and complexity. If this is not the correct service for your order, please view our other assembly options or contact us before purchasing.
Frequently Asked Questions
No. The $700 fee covers assembly only. Shipping and delivery are charged separately. Please see our Shipping & Delivery page for current freight options, depot pickup information and delivery conditions. Please make sure the installation area is clean, clear and ready for assembly. Remove vehicles, furniture, boxes, existing gym equipment and other obstacles before the scheduled appointment. Moving heavy items or preparing the installation area is not included in the standard assembly fee. If additional labour or time is required, an extra charge may apply. Please tell us in advance if you need assistance so we can confirm availability and pricing before the appointment. Please contact us before booking. Stairs, lifts, basements, narrow entrances, long carrying distances and other restricted access may require additional labour or a different service arrangement. No. Gym flooring installation is separate and must be quoted or booked independently. No. This assembly service is available only for eligible equipment purchased directly from 247 Gym Equipment. Assembly is coordinated through approved third-party technicians experienced in gym-equipment assembly. Assembly time varies depending on the equipment, site access and installation conditions. Please ensure the work area is ready before arrival to help the installer complete the job efficiently.Does the $700 assembly fee include shipping or delivery?
What should I do before the installer arrives?
What happens if the installer has to move heavy items or clear the area?
What if my installation area has stairs, lift access or a long carry?
Does the assembly service include gym flooring?
Can you assemble equipment purchased from another company?
Who performs the assembly?
How long does assembly take?
Assembly availability is subject to location, installer availability and site access. Please contact 247 Gym Equipment before purchase if you are unsure whether this service is suitable for your order or installation location.
Functional Trainer Assembly & Installation
Professional assembly for eligible equipment purchased directly from 247 Gym Equipment, completed by experienced gym-equipment assembly technicians.
Professional Assembly of One Eligible Unit
The $400 fee covers the assembly and setup of one eligible functional trainer under this service.
Shipping and delivery are not included and are calculated separately.
The $400 assembly fee is for assembly only. Shipping, freight and delivery charges are calculated separately based on the delivery address, order size, weight and access requirements.
For current shipping rates, pallet / wooden crate delivery conditions, interstate depot pickup, tailgate requirements and delivery surcharges, please see our Shipping & Delivery page.
View Shipping & Delivery Information →What’s Included
- Professional Assembly: Assembly and setup of one eligible functional trainer.
- Component Installation: Cables, pulleys, weight stacks and supplied attachments fitted where applicable.
- Alignment & Function Check: Moving parts are checked for correct alignment and normal operation before completion.
- Final Safety Check: A final visual and operational check is completed after assembly.
- Experienced Installers: Work is coordinated through approved third-party technicians experienced in gym-equipment assembly.
The installation area must be clean, clear and ready for assembly before the installer arrives. Please remove vehicles, furniture, boxes, existing gym equipment and other items that may obstruct access or the assembly area.
Moving heavy items, relocating existing equipment, clearing the work area or other additional preparation is not included in the standard $400 assembly fee.
If the installer is required to move heavy items or spend additional time preparing the area, additional labour charges may apply. If you need help moving equipment or other heavy items, please advise 247 Gym Equipment before the installation date so we can confirm whether it can be accommodated and advise you of any additional cost.
Installation Access & Requirements
Please contact us before the installation date. Advance notice helps us allocate the correct time and labour and avoids unexpected delays or additional charges on the day.
What’s Not Included
- Shipping, freight or delivery charges.
- Moving heavy furniture, vehicles, existing gym equipment or other large items unless arranged in advance.
- Clearing or preparing an installation area that was not ready on arrival.
- Additional labour caused by undisclosed stairs, lifts, long carries, difficult access or restricted entry.
- Gym flooring installation unless separately quoted.
- Electrical work, wall mounting or structural work.
- Floor anchoring or bolting unless specifically agreed in advance.
- Removal of existing gym equipment.
- Pallet / wooden crate or bulk packaging disposal unless specifically included or agreed in advance.
- Assembly of third-party equipment not purchased from 247 Gym Equipment.
Other Assembly Services
We offer different assembly services depending on the equipment type and complexity. If this is not the correct service for your order, please view our other assembly options or contact us before purchasing.
Frequently Asked Questions
No. The $400 fee covers assembly only. Shipping and delivery are charged separately. Please see our Shipping & Delivery page for current freight options, depot pickup information and delivery conditions. Please make sure the installation area is clean, clear and ready for assembly. Remove vehicles, furniture, boxes, existing gym equipment and other obstacles before the scheduled appointment. Moving heavy items or preparing the installation area is not included in the standard assembly fee. If additional labour or time is required, an extra charge may apply. Please tell us in advance if you need assistance so we can confirm availability and pricing before the appointment. Please contact us before booking. Stairs, lifts, basements, narrow entrances, long carrying distances and other restricted access may require additional labour or a different service arrangement. No. Gym flooring installation is separate and must be quoted or booked independently. No. This assembly service is available only for eligible equipment purchased directly from 247 Gym Equipment. Assembly is coordinated through approved third-party technicians experienced in gym-equipment assembly. Assembly time varies depending on the equipment, site access and installation conditions. Please ensure the work area is ready before arrival to help the installer complete the job efficiently.Does the $400 assembly fee include shipping or delivery?
What should I do before the installer arrives?
What happens if the installer has to move heavy items or clear the area?
What if my installation area has stairs, lift access or a long carry?
Does the assembly service include gym flooring?
Can you assemble equipment purchased from another company?
Who performs the assembly?
How long does assembly take?
Assembly availability is subject to location, installer availability and site access. Please contact 247 Gym Equipment before purchase if you are unsure whether this service is suitable for your order or installation location.


Elite Signature Power Rack
Commercial Power Rack & Full Power Cage with Integrated Pull-Up Bar
Elite Signature Power Rack is a commercial power rack and full power cage built for serious lifters, PT studios, CrossFit facilities and commercial gyms across Australia. Constructed from 75×75×3mm 11-gauge steel with fully robotic welding, laser-cut numbered uprights and four-way hole spacing, this heavy duty power rack delivers the structural precision and attachment versatility that separates a genuine commercial squat rack from budget alternatives. Whether you need a home gym power rack in Sydney, Melbourne, Brisbane or regional Australia, a compact power rack for a garage gym, or a heavy duty squat rack for a commercial strength facility, the Elite Signature Power Rack handles any load with the stability, safety and expandability serious training demands. This power rack with pull-up bar is backed by a 2-year structural frame warranty and is on display at our Milperra NSW showroom, ready to buy online or view in person before you commit.
Commercial Construction. Smart Design. Heavy Duty Safety.
Premium Commercial Construction
- 75×75×3mm 11-gauge steel frame
- Fully robotic welded joints, clean, consistent and strong
- Laser-cut precision holes with smooth burr-free finish
- Commercial-grade powder coat, scratch and corrosion resistant
Smart Functional Design
- Laser-cut numbered uprights for fast, accurate adjustments
- Four-way hole design for maximum attachment compatibility
- Multi-grip pull-up bar for upper body training variety
- Integrated Olympic plate storage keeps space organised
Heavy Duty Safety and Protection
- UHMW-lined J-hooks protect barbell knurling
- Solid safety bars for confident solo training
- 4× band pegs for resistance and explosive training
- Wide stable base for heavy lifts without compromise
Elite Signature Power Rack, Full Feature Set
Complete Strength Training Coverage
Barbell Compound Lifts
- Back squat & front squat
- Flat & incline barbell bench press
- Barbell overhead press
- Rack pull & partial deadlift
- Barbell shrug & upright row
- Barbell bent-over row
Pull-Up & Bodyweight
- Wide-grip pull-up
- Narrow-grip chin-up
- Neutral-grip pull-up
- Hanging leg raise & L-sit
- Weighted pull-up (with belt)
- Band pull-apart (band pegs)
Resistance Band Training
- Banded squat & banded deadlift
- Banded bench press
- Accommodating resistance rows
- Explosive contrast training
- Band-assisted pull-up
- Hip circle & mobility work
Attachment Exercises
- Parallel bar dip (dip attachment)
- Jammer arm press & row
- Leg press (leg press attachment)
- GHD back extension & hip flexion
- Monolift squat (monolift attachment)
- Leg curl (leg curl attachment)
Ready to Train from Day One
The Power Rack That Grows With Your Gym
The four-way hole design and 75×75mm upright specification make the Elite Signature compatible with a wide range of optional attachments, turning a single power cage into a complete strength training station over time.
Why Steel Specification Matters
| Factor | Budget 60×60×2mm Racks | ⭐ Elite Signature 75×75×3mm |
|---|---|---|
| Steel Volume Per Metre | 464mm² cross-section | 869mm² cross-section, 87% more steel |
| Flex Under Heavy Load | Noticeable flex over 150kg | Negligible flex, commercial rigidity |
| Weld Quality | Manual welding, variable strength | Fully robotic, consistent precision |
| Hole Precision | Punched holes with burrs | Laser-cut, smooth and burr-free |
| Attachment Ecosystem | Limited, proprietary or no fit | Four-way hole, wide compatibility |
| J-Hook Protection | Bare steel damages barbell | UHMW lining protects knurling |
| Plate Storage | Often not included | Integrated Olympic plate holders |
| Frame Warranty | 6 to 12 months typical | 2-Year structural frame warranty |
Pros & Cons
- 75×75×3mm 11-gauge commercial steel, around 87% more steel than 60×60×2mm alternatives
- Fully robotic welded, consistent, precise, strong joints throughout
- Laser-cut numbered uprights for fast, accurate J-hook and safety bar positioning
- Four-way hole design for maximum current and future attachment compatibility
- UHMW-lined J-hooks protect barbell knurling and finish
- 4× band pegs included, ready for resistance and accommodating resistance training
- Integrated plate storage, no separate storage tree needed
- 2-year structural frame warranty
- On display at our Milperra showroom, inspect before you buy
- Sydney Metro professional installation available
- 170kg, requires two people and 2 to 4 hours for assembly
- Needs a minimum 2.4m × 2.4m floor area plus barbell clearance
- Minimum 2.4m ceiling height for pull-ups and overhead press
- Heavy freight item, confirm delivery access before ordering
- No cables or functional trainer included, add an XG75 or XF10 for cable work
- Optional attachments sold separately
The Elite Signature Power Rack Is Ideal For
- Serious home gym owners Who want a genuine commercial power rack at home without commercial gym prices. The 75×75×3mm specification is built to outlast your training career.
- PT studios and boutique gyms A commercial squat rack rated for multi-user daily heavy use. Integrated plate storage and UHMW J-hooks keep a professional appearance under constant use.
- Powerlifters and strength athletes A powerlifting rack where UHMW J-hooks protect expensive barbells, band pegs support accommodating resistance training, and the four-way hole system suits a monolift and spotter arms.
- CrossFit and functional fitness athletes Multi-grip pull-up bar, band peg attachments and a full attachment ecosystem support varied functional training programming beyond basic barbell lifts.
- Garage gym builders across Australia A garage gym power rack built to commercial specification that fits a standard garage footprint. Available Australia-wide, including Sydney, Melbourne, Brisbane, Adelaide and Perth.
- Schools and corporate gym fitouts Commercial steel and robotic welding rated for high-frequency multi-user environments, backed by a 2-year structural warranty and a simple, expandable attachment system.
Full Specifications
| Product | Elite Signature Power Rack, Commercial Full Power Cage |
| Dimensions | 1290mm (W) × 1254mm (L) × 2303mm (H) |
| Weight | 170kg |
| Steel Uprights | 75mm × 75mm × 3mm, 11-gauge commercial steel |
| Hole Size | 1 inch (25.4mm), standard commercial hole specification |
| Hole Pattern | Four-way design for maximum attachment compatibility |
| Upright Markings | Laser-cut numbered positions for fast, accurate height adjustments |
| Welding | Fully robotic welded, consistent, precise, burr-free construction |
| Finish | Commercial-grade electrostatic powder coat, scratch and corrosion resistant |
| J-Hooks | Heavy duty with UHMW lining, protects barbell knurling and finish |
| Safety Bars | Solid steel safety bars (pair), adjustable height, rated for heavy solo training |
| Pull-Up Bar | Multi-grip, wide, narrow and neutral grip positions |
| Band Pegs | 4× band pegs included for resistance and explosive training |
| Plate Storage | Integrated Olympic plate holders, keeps training area organised |
| Minimum Space | 2.4m (W) × 2.4m (D) training area, 2.4m minimum ceiling height |
| Compatible Attachments | Dip bars, jammer arms, leg press, GHD, monolift, spotter arms, leg curl, lat pulldown, landmine |
| Warranty | 2-Year structural frame warranty |
| Assembly | 2 to 4 hours (2 people recommended). Sydney Metro professional installation available |
| Delivery | Australia-wide freight, Sydney, Melbourne, Brisbane, Adelaide, Perth, Canberra |
Frequently Bought With This Power Rack
Elite Signature Power Rack, FAQ
Sydney (NSW) · Parramatta · Penrith · Blacktown · Liverpool · Campbelltown · Bankstown · Eastern Suburbs · Northern Beaches · Inner West · Upper North Shore · Castle Hill · Western Sydney · Sutherland Shire · Wollongong · Newcastle · Melbourne (VIC) · Richmond · Brunswick · Essendon · Glen Waverley · Geelong · Ballarat · Brisbane (QLD) · Gold Coast · Sunshine Coast · Ipswich · Toowoomba · Adelaide (SA) · Norwood · Glenelg · Port Adelaide · Perth (WA) · Canberra (ACT) · Hobart (TAS) · Darwin (NT) · All Regional Australia


Commercial Half Rack with Weight Plate Storage | Heavy Duty Squat Rack
Commercial Half Rack with Weight Plate Storage | Heavy Duty Squat Rack
Standard home racks use 50×50mm tubing, which flexes noticeably under heavy squats and rack pulls. The 75×75mm box section on this half rack stays completely rigid under 500kg loading. The 17 laser-cut numbered positions let every athlete note their exact J-hook height by number and return to it instantly, with no counting holes and fast changeovers between multiple athletes in a studio or commercial setting.
Barbell Compound Lifts
- Barbell back squat
- Barbell front squat
- Barbell bench press (flat)
- Barbell overhead press
- Rack pull (partial deadlift)
- Barbell good morning
Pull-Up & Chin-Up
- Wide-grip pull-up
- Chin-up (supinated)
- Neutral-grip pull-up
- Weighted pull-up (dip belt)
- Dead hang
- Kipping / toes-to-bar
Dips & Bodyweight
- Parallel bar dips, tricep
- Parallel bar dips, chest
- Weighted dips
- L-sit hold
- Hanging leg raise
- Muscle-up progressions
Strength & Accessory
- Pin press (partial overload)
- Pause squat (from pins)
- Close-grip bench press
- Seated overhead press
- Barbell hip thrust
- Box squat
| Frame Material | 75mm × 75mm × 2mm structural steel |
| Dimensions | 153cm (W) × 141cm (D) × 234cm (H) |
| Unit Weight | 126kg |
| Load Capacity | 500kg (1100lbs), tested |
| Height Positions | 17, laser-cut and individually numbered |
| J-Hooks | Pistol-grip with protective inner lining |
| Safety Arms | Adjustable spotter arms, multi-position |
| Pull-Up Bar | Multi-grip: wide, narrow, neutral, angled |
| Dip Station | Adjustable width, mounts to uprights |
| Weight Plate Storage | 6 integrated Olympic plate storage pegs |
| Finish | Matte black powder coat |
| Ceiling Clearance | 250 to 260cm minimum recommended |
| Warranty | 2 years on frame |
| Delivery | Australia-wide, all states and territories |
- 75×75mm uprights: commercial rigidity, superior to 50×50mm home racks
- 500kg tested capacity, powerlifting and strongman ready
- 17 laser-cut numbered positions for fast, precise adjustment every session
- Pistol-grip J-hooks allow single-handed repositioning
- 6 integrated weight plate storage pegs mean no separate weight tree needed
- Multi-grip pull-up bar and dip station included as standard
- Sydney Metro professional installation available
- 126kg unit weight, so two people are required for safe assembly
- 234cm tall, so check ceiling clearance before ordering
- Rubber gym tiles recommended, not suited to carpet or uneven surfaces
- Barbell, weight plates and bench not included
- Home gym owners wanting commercial stability, with 75×75mm uprights and a 500kg rating, without the footprint or price of a full commercial power rack
- PT studios and boutique gyms, where numbered positions and pistol-grip J-hooks support fast athlete changeovers and integrated plate storage keeps the floor clear
- Strength athletes and powerlifters, since 500kg capacity covers elite compound training and spotter arms enable safe solo training to failure
- Bodybuilders and hypertrophy athletes, with a multi-grip pull-up bar and dip station covering all upper body bodyweight movements alongside barbell work
- Anyone upgrading from a 50×50mm home rack, as a direct commercial-spec upgrade with numbered positions and pistol-grip hardware
Sydney (NSW), Parramatta, Bankstown, Liverpool, Penrith, Blacktown, Campbelltown, Bondi, Chatswood, Castle Hill, Northern Beaches, Manly, North Sydney, Inner West, Sutherland Shire, Eastern Suburbs, Ryde, Melbourne (VIC), Richmond, Brunswick, Essendon, Frankston, Dandenong, Geelong, Ballarat, Brisbane (QLD), Gold Coast, Sunshine Coast, Toowoomba, Cairns, Adelaide (SA), Perth (WA), Canberra (ACT), Wollongong (NSW), Newcastle (NSW), Hobart (TAS), Darwin (NT)


Professional Rubber Gym Flooring Installation
Get your gym floor laid properly by a team that understands heavy-duty gym flooring. We install flooring purchased directly from 247 Gym Equipment for home gyms, PT studios and commercial fitness spaces.
Complex Installation — 20% Surcharge: A 20% surcharge applies to the total installation price where the installation area has one or more columns/pillars OR above-standard/difficult cutting. This includes irregular or angled walls, multiple difficult cuts, fixed structures, recesses, unusual room shapes or significantly more cutting than a normal rectangular room.
Installation Pricing
Straightforward per-tile pricing for standard installations.
Installation only. Applies to standard 1m × 1m tiles with normal straight-wall and perimeter cutting.
Quick price examples
Delivery is not included. Freight and delivery are charged separately based on postcode, order size, total weight and site access. If the online freight quote seems high, contact us before ordering and we can check alternative freight options.
Included in Standard Installation
Not Included / Quoted Separately
Flooring We Install
Installation is available for compatible flooring purchased directly from 247 Gym Equipment.
Rubber Gym Tiles
Heavy-duty 15mm and 20mm rubber tiles for home gyms, garages and PT studios.
EPDM Rubber Tiles
Premium coloured-fleck and EPDM surface tiles for professional gym finishes.
Interlocking Flooring
Compatible interlocking gym flooring for functional and mixed-use training areas.
Lifting Areas
Rubber flooring layouts for deadlift, strength and Olympic lifting zones.
Commercial Gyms
Flooring installations for commercial gyms, schools, studios and fitness facilities.
Home & Garage Gyms
Clean, practical flooring installations for dedicated home training spaces.
Installation Requirements
Preparing the room correctly helps the installation run smoothly and avoids unexpected charges.
Room Must Be Completely Clear
The entire installation area must be empty and ready for flooring before our installers arrive. Please remove all gym equipment, furniture, boxes, vehicles and other items. If our installers need to move items, additional labour charges will apply.
Floor Must Be Ready
The installation surface must be clean, dry, reasonably level and completely free of dust, dirt, debris, oil and loose material before our installers arrive. Any additional cleaning or floor preparation required on site may incur an additional charge.
No Adhesive in Standard Installation
Our standard rubber tile installation is a loose-lay / floating installation. Adhesive or glue is not supplied or applied as part of the standard installation. If adhesive is genuinely required for a particular site, it must be discussed and quoted separately before installation.
Tell Us About Access
Please advise us about stairs, lifts, basements, restricted parking, long carries or difficult access before booking. Extra handling or labour may be charged where access is not standard.
Show Us Difficult Cutting
Send photos or a floor plan if there are columns, pillars, angled walls, recesses or fixed structures so we can confirm the installation requirements and any applicable 20% surcharge.
Existing Floor Preparation
Removal of old flooring, glue residue, grinding, levelling, filling major cracks or holes, moisture treatment and other subfloor preparation are not included unless specifically quoted.
247 Gym Equipment Flooring Only
Our flooring installation service is available only for flooring purchased directly from 247 Gym Equipment. We do not install flooring supplied by other retailers, contractors or third parties.
Site Readiness — Important: The flooring area must be ready for immediate installation when our team arrives. The room must be completely clear of all items and the floor must be clean, dry, dust-free and free of debris or loose material. Standard installation does not include cleaning the room, moving equipment or furniture, removing old flooring or adhesive, levelling/repairing the subfloor, or applying glue/adhesive. Installation is only available for flooring purchased directly from 247 Gym Equipment. If additional labour or preparation is required because the site is not ready, additional charges may apply.
What to Send Us
- Total tile quantity / floor area — or room dimensions so we can confirm the size.
- Photos of the room — including corners, doors and the full installation area.
- Photos of columns, pillars or fixed structures — especially anything requiring difficult cutting.
- Subfloor type and condition — concrete, timber, existing tiles, raised flooring, cracks or uneven areas.
- Access details — ground floor, stairs, lift, loading dock, parking and distance from unloading point.
- Your preferred installation date — so we can check installer availability.
Melbourne & Brisbane installation is also available. Standard installation is $19.50 per tile with a 20-tile minimum. Delivery is charged separately. The same 20% complex-installation surcharge applies where there are one or more columns/pillars OR above-standard/difficult cutting.
Service Areas
Contact us for outer-suburb and regional availability.
Important flooring note: Rubber gym tiles may have small manufacturing tolerances and slight variations in colour, thickness, surface texture or dimensions between tiles or production batches. Our installers will position and fit the tiles to achieve the best practical finish. For the most consistent result, order all flooring required for the same area at the same time.
Frequently Asked Questions
What is the minimum installation order?
How much does flooring installation cost?
Is delivery included in the installation price?
What is included in standard installation?
When does the 20% complex-installation surcharge apply?
Do I need to buy the flooring from 247 Gym Equipment?
Should flooring be installed before the gym equipment?
Does the room need to be empty and the floor cleaned before installation?
Do you glue the tiles down?
How long does installation take?
Do you install commercial gym flooring?
Need a Flooring Installation Quote?
Send us your tile quantity, postcode and a few photos of the room. If there are columns, pillars or unusual cutting areas, include photos of those as well.


Ab Roller Wheel – Stability, Comfort & Effective Workouts
The Ab Roller Wheel features a non-slip rubber friction tread, ensuring enhanced stability and control during workouts. Its cushioned foam handles are ergonomically designed for superior comfort and grip.
Design
- Double-wheel construction for improved balance and slip resistance.
- Ergonomic handles for a secure and comfortable grip.
- Classic, minimalist design that suits all preferences.
- A practical and effective fitness tool to help you stay fit and healthy.
Fitness Benefits
- Promotes upright posture and a healthy back by strengthening both back and abdominal muscles.
- Thoughtfully designed to relieve spinal pressure while effectively strengthening core muscles.
- Ideal for preventing and managing back pain, ensuring long-term mobility and pain-free movement.
- Suitable for both beginners and advanced users.
Functionality
- Simply grab the handles and roll forward and backward, engaging your upper body muscles.
- Maintain core tension throughout the movement for maximum effectiveness.
- Avoid tilting your pelvis backward to prevent a hollow back and ensure proper muscle engagement.
- Targets abs, back, arms, and shoulders simultaneously.
Quality & Durability
- Built with a robust metal frame and dual-wheel system for superior stability.
- Lightweight, sturdy, and long-lasting construction.
- The soft material around the wheels provides excellent traction while gliding smoothly across the floor without leaving marks.
Additional Information
- Quick and easy assembly with a smart plug-in system.
- Includes a knee pad for added comfort and protection during workouts.
Wheel Diameter: 30 cm


Commercial 2 Tier Dumbbell Rack | Heavy-Duty Storage Stand 24/7 GYM EQUIPMENT
Commercial 2 Tier Dumbbell Rack | Heavy-Duty Storage Stand 24/7 GYM EQUIPMENT
2 Tier Dumbbell Rack — Commercial Dumbbell Storage Stand Z-Frame Hex Dumbbell Organiser · 6–9 Pairs Capacity | Home Gym & PT Studio | Matte Black | Australia
The Commercial 2 Tier Dumbbell Rack is a heavy-duty dumbbell storage stand built for home gyms, PT studios and commercial facilities across Australia. Engineered with a reinforced Z-frame steel structure — more stable than standard A-frame dumbbell stands — this rack holds 6–7 pairs of standard hex dumbbells, or up to 9 pairs for smaller sizes, across two angled safety trays that prevent rolling and make re-racking easier on your wrists and lower back. Finished in a scratch-resistant matte black powder coat with rubberised floor protection feet.
How Many Dumbbells Fit?
Standard A-frame dumbbell racks have a narrow base that can tip forward when heavily loaded from the front. The Z-frame design distributes weight across a wider, deeper base — eliminating the tip-forward risk when pulling dumbbells from the lower shelf. For commercial facilities and home gyms where safety matters, the Z-frame is the more stable dumbbell storage solution.
Why a Dedicated Dumbbell Stand Matters
Built for Commercial Daily Use
Technical Details
| Configuration | 2-tier angled storage trays |
| Capacity — Standard Dumbbells | 6–7 pairs (approx. 3 pairs per shelf for larger/heavier sizes) |
| Capacity — Small Dumbbells | Up to 9 pairs (approx. 4–5 pairs per shelf for compact light sizes) |
| Frame Style | Heavy-duty Z-frame construction |
| Material | Commercial-grade steel |
| Finish | Matte black scratch-resistant powder coat |
| Floor Protection | Rubberised non-slip foot caps |
| Assembly | Bolt-together — under 15 minutes, all hardware included |
| Compatible With | Hex dumbbells (recommended) — round dumbbells also supported |
| Best For | Home gyms, PT studios, corporate gyms, commercial facilities, garage gyms |
| Delivery | Australia-wide — Sydney, Melbourne, Brisbane, Adelaide, Perth & regional |
2 Tier Z-Frame vs A-Frame vs Vertical Stand
| Feature | A-Frame Stand | Vertical Stand | This 2 Tier Z-Frame |
|---|---|---|---|
| Stability Under Load | Can tip forward when loaded | Moderate | Z-frame — wide stable base |
| Typical Capacity | 4–6 pairs | 6–8 pairs | 6–9 pairs (size dependent) |
| Angled Shelves | Usually flat | No shelves | Ergonomic angled trays |
| Floor Footprint | Compact | Very compact | Compact — 2 tier layout |
| Re-racking Ease | Moderate | Requires bending low | Angled trays reduce strain |
| Commercial Grade | Often residential | Varies | Commercial steel frame |
| Assembly | Simple | Simple | Under 15 minutes |
The Right Dumbbell Storage Solution For
- Home gym owners — organise a starter dumbbell set in a compact footprint without leaving weights on the floor; ideal for sets up to around 30–35kg per dumbbell
- PT studios & personal trainers — keeps rehab, mobility and strength weights organised for quick client access and eliminates trip hazards between sessions
- Apartment & small space gyms — 2-tier compact layout maximises storage with a minimal floor footprint, ideal for tight training spaces
- Corporate & building gyms — durable low-maintenance commercial steel for high-traffic unsupervised facilities where equipment takes daily use
- Garage gym owners — powder-coated finish and rubber feet handle the temperature variations and floor surfaces of Australian garage and shed gyms
- Gym fitouts & new builds — pairs with our full range of rubber hex dumbbells (5kg–50kg) for a complete matching storage and dumbbell set
Pros & Cons
- Z-frame — more stable than A-frame alternatives under heavy loads
- 6–7 pairs standard capacity, up to 9 pairs for smaller dumbbells
- Angled shelves reduce wrist and lower back strain during re-racking
- Matte black powder coat — scratch-resistant, professional look
- Rubber feet protect all floor types including hardwood and tile
- Under 15 min assembly — all hardware included, no special tools
- Optimised for hex dumbbells — round dumbbells may not sit as securely
- Capacity varies by dumbbell size — larger heavy dumbbells reduce pairs per shelf
- 2 tiers only — for larger sets (10+ pairs) consider a 3-tier rack
- Lower shelf requires bending to access heavier dumbbells
Complete Your Dumbbell Setup
Common Questions
Sydney (NSW) · Parramatta · Bankstown · Liverpool · Penrith · Blacktown · Campbelltown · Bondi · Chatswood · Manly · Cronulla · Hornsby · Castle Hill · Northern Beaches · Inner West · Melbourne (VIC) · Brisbane (QLD) · Adelaide (SA) · Perth (WA) · Canberra (ACT) · Gold Coast · Newcastle · Wollongong · Sunshine Coast · Geelong · Hobart (TAS) · Darwin (NT) · Cairns · Townsville
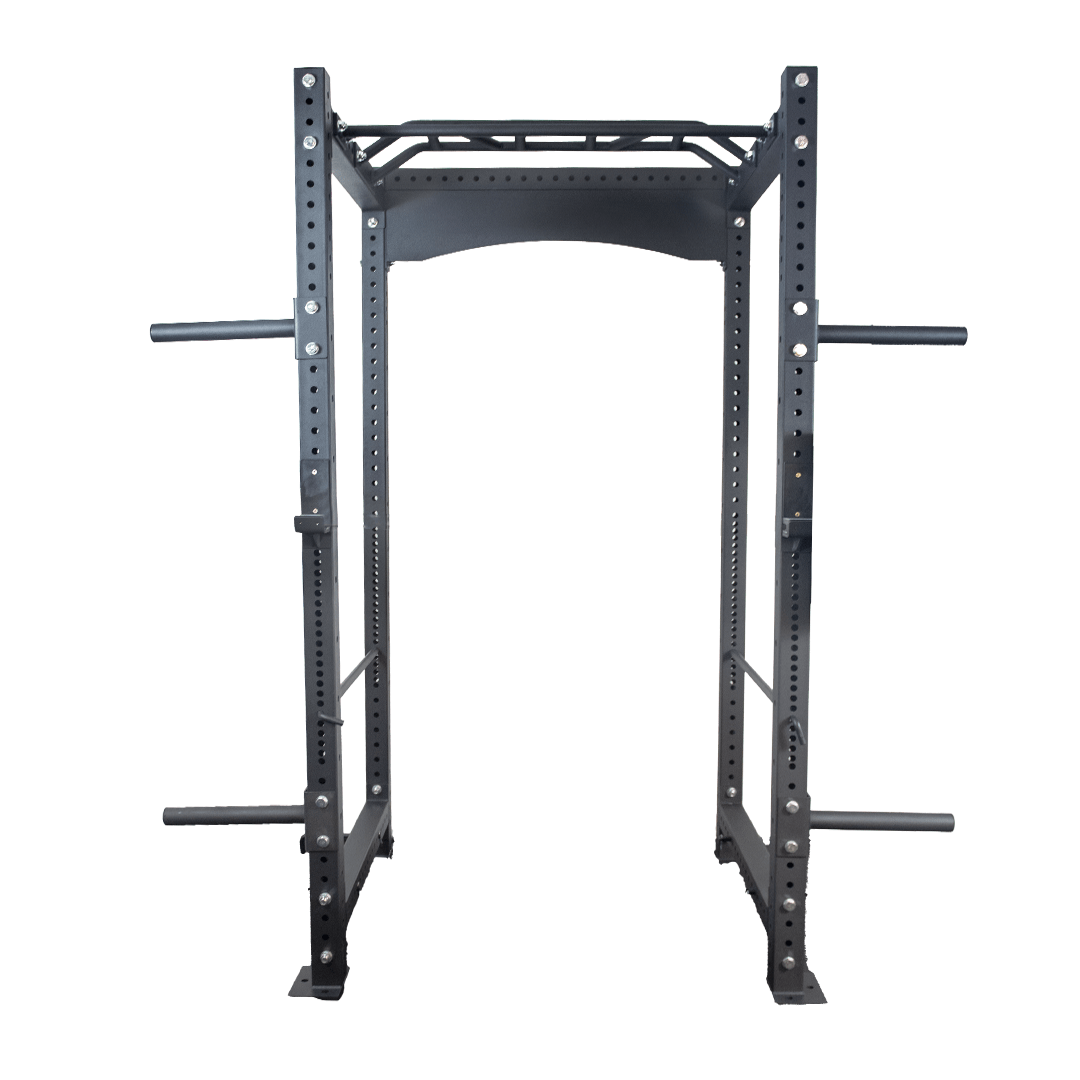
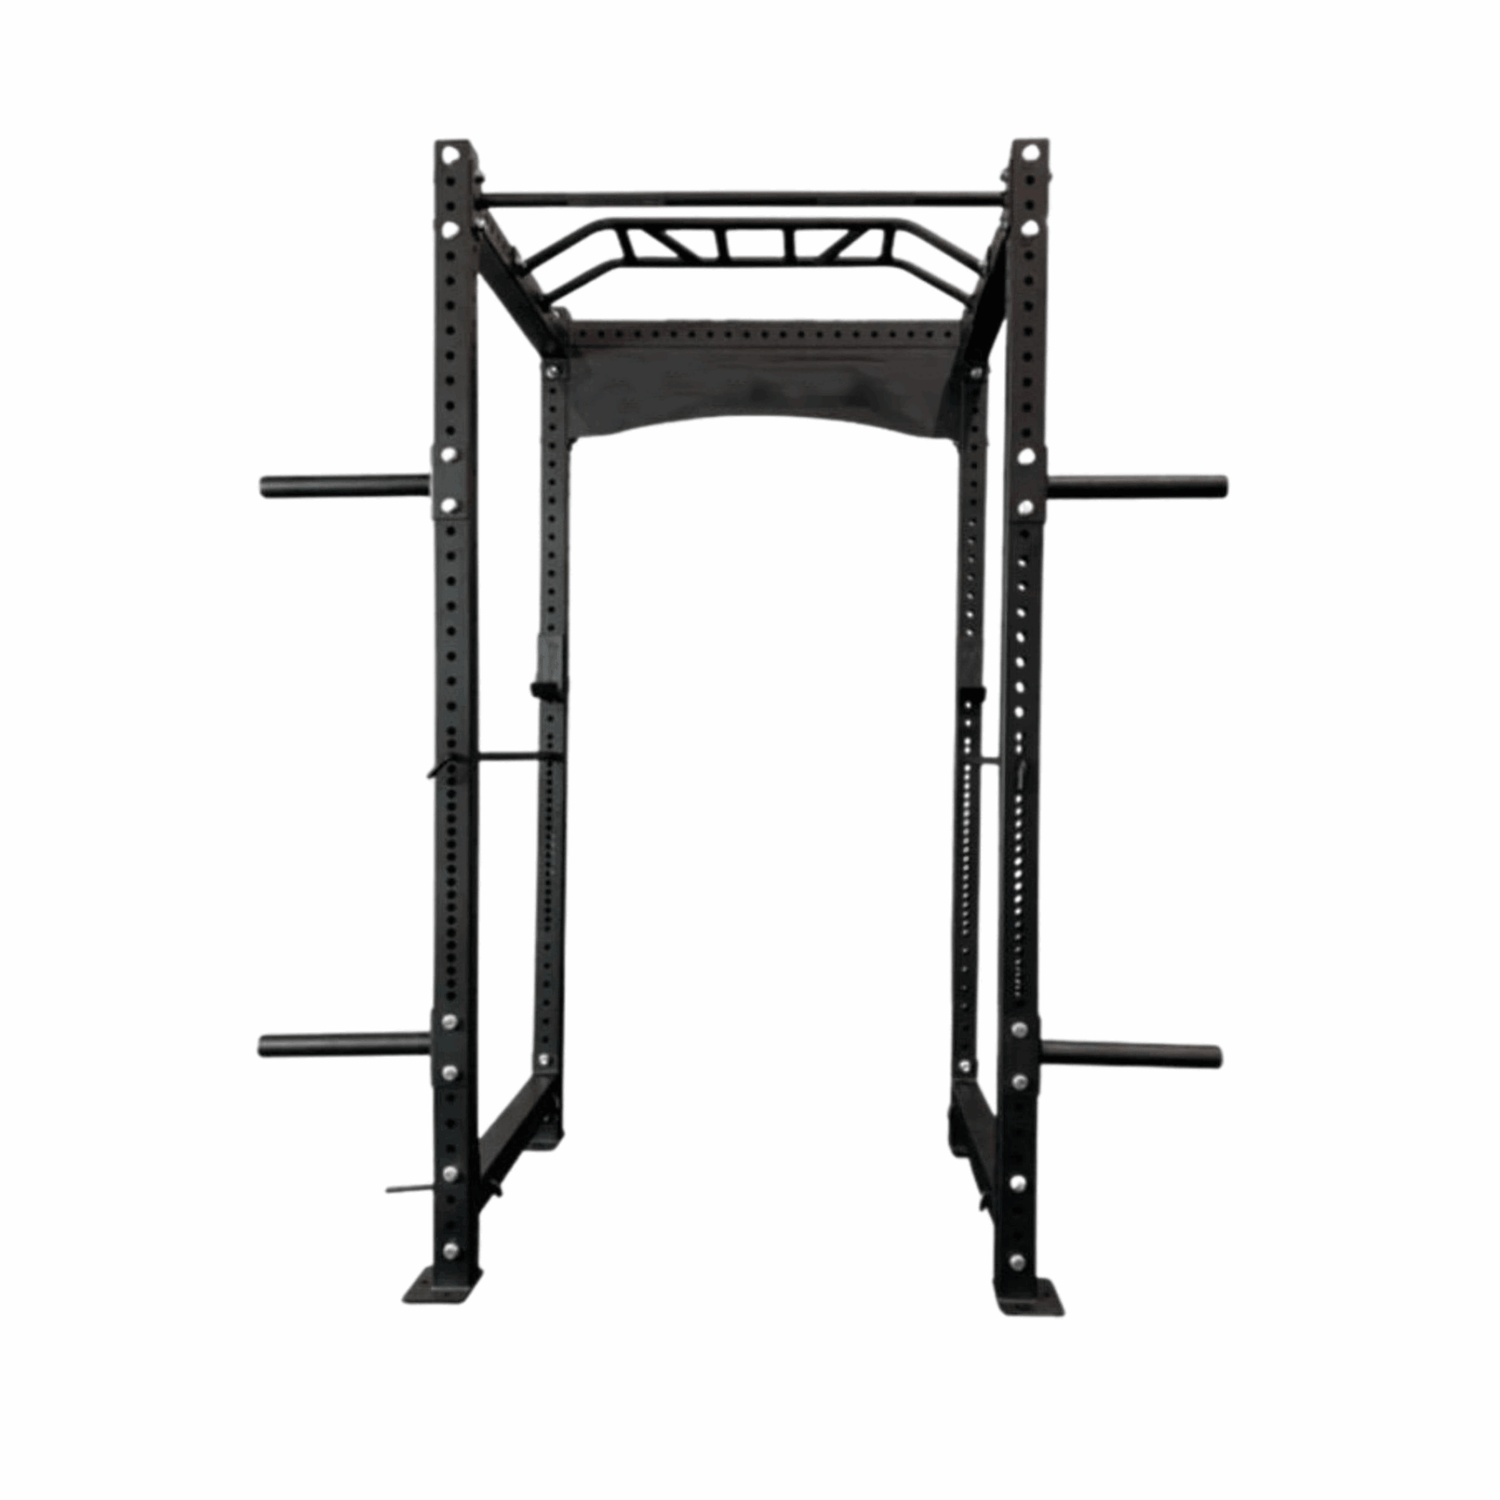

A 50×50mm upright (used on most budget and mid-range racks) has approximately 40% less cross-sectional steel than a 75×75mm upright at the same wall thickness. Under heavy loading — particularly during dynamic movements like squats where the bar oscillates — 50×50mm frames produce measurable flex and noise. The 75×75×3mm uprights on this commercial power rack stay completely rigid. Combined with the 8mm thick base plate reinforcement and 145kg frame weight, there is zero wobble at any load within the 1000kg rated capacity.
| Upright Profile | 75mm × 75mm × 3mm steel (11-gauge) |
| Base Plate Thickness | 3mm reinforced steel plate |
| Frame Weight | 145kg |
| Static Weight Rating | 1000kg |
| Hole Diameter | 18mm — standard pin diameter for compatible J-hooks and accessories |
| Hole Spacing | Westside spacing (25mm increments at bench height) · standard spacing elsewhere |
| Hole Numbering | Laser-cut numbered positions throughout |
| Dimensions (H×W×D) | 2,290mm × 1,322mm × 1,162mm |
| Pull-Up Bars | 33mm straight bar + multi-grip bar — both included |
| Plate Storage | 4× Olympic plate storage posts |
| Band Pegs | 4× adjustable band pegs |
| Finish | Double powder-coat matte black |
| Floor Anchoring | Pre-drilled base feet — bolt-down ready |
| J-Hooks | Not included — sold separately (sandwich J-hooks recommended) |
| Safety Arms | Not included — flip-down safety bars available separately |
| Barbell Compatibility | All 50mm Olympic barbells — standard 7ft bar recommended |
| Dispatch | In stock — daily dispatch from Milperra NSW · Click & Collect available |
| Specification | This Commercial Power Rack | Mid-Range Rack (~$500–800) | Budget Rack (~$200–400) |
|---|---|---|---|
| Upright Profile | 75×75×3mm (11-gauge) | 60×60mm or 50×50mm | 50×50mm or thinner |
| Base Reinforcement | 3mm thick steel plate | Standard footplate only | Thin footplate — flex risk |
| Static Weight Rating | 1000kg rated | 300–500kg typical | ~150–250kg |
| Hole Spacing | Westside (25mm at bench) | Standard 50mm only | Standard 50mm only |
| Hole Numbering | Laser-cut numbered | Sometimes numbered | Usually unnumbered |
| Pull-Up Bars | Straight + multi-grip (both included) | Usually 1 bar | 1 basic bar or none |
| Band Pegs | 4 adjustable pegs — included | Sometimes included | Rarely included |
| Plate Storage | 4 posts — included | Sometimes 2 posts | Rarely included |
| Floor Bolt Ready | Pre-drilled — bolt-down ready | Sometimes | Rarely |
- Serious home gym and garage gym owners — the 75×75mm uprights, 1000kg rating and 145kg frame weight deliver genuine commercial durability without the commercial facility price tag; a one-time purchase that will outlast cheaper alternatives
- PT studios requiring a high-capacity daily-use rack — the commercial steel specification, 1000kg rating and dual pull-up bars handle multiple clients per day without the frame wear, J-hook slippage or wobble common in lighter-gauge racks
- Commercial gym fitouts in Sydney, Melbourne and Brisbane — in-stock with daily dispatch from Milperra NSW; contact us for bulk pricing on multi-rack commercial gym fitout orders
- Powerlifters and strength athletes training heavy — Westside hole spacing, 1000kg rating and laser-cut numbered positions are the features competitive lifters specifically look for; this rack handles elite competition-level training loads
- Anyone upgrading from a budget or mid-range rack — if your current rack flexes, wobbles, has inadequate hole spacing or has J-hook slippage at heavy loads, this is the upgrade that eliminates all of those compromises permanently
10/202 Milperra Road, Milperra NSW 2214 · Mon–Fri 9am–5pm · Sat 9am–1pm. Commercial gym fitout pricing available — contact us for multi-rack bulk orders for Sydney, Melbourne and Brisbane facilities.
Sydney (NSW) · Parramatta · Bankstown · Liverpool · Penrith · Blacktown · Campbelltown · Bondi · Chatswood · Castle Hill · Northern Beaches · Manly · North Sydney · Mosman · Inner West · Sutherland Shire · Lower North Shore · Eastern Suburbs · Ryde · Central Coast · Newcastle · Wollongong · Melbourne (VIC) · Richmond · Brunswick · Essendon · Frankston · Dandenong · Geelong · Ballarat · Brisbane (QLD) · Fortitude Valley · Gold Coast · Sunshine Coast · Toowoomba · Cairns · Adelaide (SA) · Perth (WA) · Canberra (ACT) · Hobart (TAS) · Darwin (NT)


Dumbbell Set 1–10kg Pairs + Vertical Rack | 24/7 Gym Equipment Australia
Dumbbell Set 1–10kg Pairs + Vertical Rack | 24/7 Gym Equipment Australia
1-10kg Rubber Hex Dumbbell SetWith Vertical Storage Rack
This 1-10kg rubber hex dumbbell set gives you ten pairs of dumbbells, from 1kg through to 10kg in 1kg increments, along with a vertical A-frame dumbbell rack to keep them organised. It is a straightforward way to build a complete light-to-medium dumbbell range for a home gym, PT studio, or small group fitness space without buying each weight separately.
Every dumbbell in the set has a solid steel core, a rubber hex coating, and a chrome knurled handle. The hexagonal head stops the dumbbells rolling when they are set down, which matters in a home gym where floor space is limited. The rack stands 153cm tall on a 70cm wide base, so it holds the full set in a compact footprint against a wall or in a corner.
Below you will find the full weight breakdown, construction details, specifications, and who this set is best suited to, so you can confirm it is the right fit before you buy.
Everything In This Package
What Stands Out In This Set
Optional Upgrades
What You Can Train With This Set
Shoulders
- Lateral raises, 3-6kg
- Front raises, 3-6kg
- Dumbbell shoulder press, 6-10kg
- Rear delt flyes, 4-8kg
Arms
- Bicep curls, 5-10kg
- Hammer curls, 5-10kg
- Tricep extensions, 4-8kg
- Tricep kickbacks, 4-8kg
Back
- Bent-over rows, 6-10kg
- Single-arm rows, 6-10kg
- Incline flyes, 6kg
Legs, Core & Conditioning
- Goblet squats, 8-10kg
- Weighted lunges, 8-10kg
- HIIT and circuit training, 3-8kg
- Rehab and mobility work, 1-3kg
Technical Specifications
| Set Contents | 10 pairs: 1kg, 2kg, 3kg, 4kg, 5kg, 6kg, 7kg, 8kg, 9kg, 10kg |
| Total Weight Included | 110kg combined, all pairs |
| Dumbbell Head Material | Solid steel core with rubber hex coating |
| Dumbbell Head Shape | Anti-roll hexagonal |
| Handle Material | Chrome with diamond knurling |
| Handle Diameter | 28-32mm, varies by weight |
| Head Finish | Matte black rubber |
| Rack Type | Vertical A-frame dumbbell rack |
| Rack Dimensions | 153cm high x 70cm wide base |
| Rack Tier Spacing | 6cm between each storage hook |
| Rack Capacity | Holds all 10 pairs, 1-10kg |
| Rack Frame | Steel with rubber feet |
| Usage Grade | Home gym, PT studio, group fitness |
| Warranty | To confirm |
| In Stock | Yes, dispatched from our NSW warehouse |
Pair Weights And Best Uses
| Weight | Pair Total | Best Used For |
|---|---|---|
| 1kg | 2kg | Warm-up, rehab, wrist movements |
| 2kg | 4kg | Mobility work, high-rep shoulder raises |
| 3kg | 6kg | Lateral raises, front raises |
| 4kg | 8kg | Bicep curls, tricep extensions, core circuits |
| 5kg | 10kg | Full upper body isolation, most-used weight |
| 6kg | 12kg | Shoulder press, rows, incline flyes |
| 7kg | 14kg | Progressive overload from 5-6kg |
| 8kg | 16kg | Dumbbell press, bent-over rows, HIIT circuits |
| 9kg | 18kg | Intermediate compound movements, goblet squats |
| 10kg | 20kg | Pressing, rows, goblet squats, upper limit of the set |
Pros And Cons
- Covers a full 1-10kg range in 1kg increments for precise progression
- Rack keeps all 10 pairs organised in a 70cm wide footprint
- Rubber hex coating protects floors and reduces noise
- Anti-roll design, dumbbells stay put between sets
- Suits home gyms, PT studios, and rehab settings alike
- 10kg is the top weight, compound lifters will outgrow it for pressing and rows
- 110kg total package is heavy, expect two people for rack assembly and loading
- Rack requires basic assembly on delivery
- Ships via heavy freight, not a standard parcel delivery
Who This Dumbbell Set Suits
- Home gym beginnerswho want every weight from 1kg to 10kg in one organised package, without buying pairs separately.
- PT studios and group fitness spacesthat need a full light dumbbell range covering rehab through to conditioning in one station.
- Apartment and small space gymswhere the 70cm wide vertical rack needs to fit against a wall or in a corner.
- Allied health and rehabilitation settingsthat rely on the 1-5kg range for precise, low-load progressive exercises.
- Buyers building a home gym from scratchwho want the rack included rather than sourcing storage separately.
This Set Is Probably Not Right For You If...
You are an established lifter who already trains compound movements like rows, presses, and lunges above 10kg per hand, since this set tops out at 10kg. It is also not the right fit if you have very limited floor space and cannot fit a 70cm wide rack, or if you only need one or two specific weights rather than a full 1-10kg range.
See It In Person
Getting It To You
Related Products
Frequently Asked Questions


Commercial FID Adjustable Weight Bench – 400kg Rated Heavy-Duty Gym Bench
Commercial FID Adjustable Weight Bench – 400kg Rated Heavy-Duty Gym Bench
Commercial Adjustable Weight Bench
400kg FID Bench | Heavy-Duty | Australia
The Commercial Adjustable Weight Bench is engineered for serious lifters who refuse to compromise on stability, safety or longevity. With a 400kg combined load capacity, 12 backrest positions and a heavy-duty powder-coated steel frame, this FID bench (Flat, Incline, Decline) is built for daily use in home gyms, PT studios and commercial facilities across Australia. Unlike budget benches that flex or wobble under load, this commercial-grade unit stays rock-solid — session after session.
Most budget benches are rated to 150–200kg and use thin-wall steel that flexes under heavy loading. This commercial-grade bench combines a 400kg load rating, reinforced seamless welds, a 66cm wide base and 6cm high-density padding — the same specification demanded by PT studios and commercial gyms across Australia.
Built for Commercial-Grade Performance
Train Every Angle, Every Muscle
Chest & Pressing
- Flat barbell bench press
- Incline dumbbell press
- Decline chest press
- Incline dumbbell fly
- Close-grip bench press
Shoulders & Arms
- Seated dumbbell shoulder press
- Lateral raises (seated/incline)
- Dumbbell bicep curls
- Overhead tricep extension
- Arnold press
Back & Rows
- Chest-supported dumbbell row
- Incline rear delt fly
- Supported barbell row
- Single-arm dumbbell row
Core & Glutes
- Decline sit-ups / crunches
- Hip thrusts (glute bridge)
- Step-ups (plyometric)
- Decline Russian twist
Technical Details
| Maximum Load Capacity | 400kg (User + Weights combined) |
| Footprint | 136cm (L) × 66cm (W) × 46cm (H) |
| Backrest Adjustment | 12 positions (flat to vertical) |
| Seat Adjustment | 2 positions |
| Net Weight | 34kg |
| Upholstery Thickness | 6cm commercial-grade high-density padding |
| Frame Material | Industrial-grade powder-coated steel, reinforced welds |
| Mobility | Built-in transport wheels and ergonomic handle |
| Position Types | FID — Flat, Incline, Decline |
| Best For | Commercial gyms, PT studios, home gyms, garage gyms |
| Delivery | Australia-wide — Sydney, Melbourne, Brisbane, Adelaide, Perth |
| Factor | Flat Bench | FID Bench (This Model) |
|---|---|---|
| Chest Angles | Flat only | Flat, incline & decline |
| Shoulder Training | Limited | Full range seated + incline |
| Core Exercises | Limited | Decline sit-ups, hip thrusts |
| Muscle Targeting | Basic | Upper, mid & lower chest + shoulders |
| Space Required | Less | Compact 136cm footprint |
| Best For | Powerlifting focus | All-round strength & hypertrophy |
For Every Serious Lifter
- Commercial gyms & fitness studios — 400kg rated frame handles high-frequency, high-turnover daily use
- Personal training studios (PT studios) — adjustable safety and smooth angle changes support clients at every level
- High-end home & garage gyms — commercial performance in a compact, mobile footprint
- Strength & powerlifting programs — rock-solid base for heavy bench pressing without wobble or flex
- Rehabilitation & physio training — controlled incline angles support safe progressive loading during recovery
- School gyms & corporate wellness centres — commercial build quality for multi-user environments
Common Questions


3 Bar Leg Stretcher — Adjustable Stainless Steel Split Trainer
Struggling to reach full splits? The 3 Bar Adjustable Leg Stretcher by 24/7 Gym Equipment gives you a controlled, measurable stretch every single session — so you can see real flexibility gains week after week. Built from professional-grade stainless steel with EVA foam grips, it's the same tool used by martial artists, dancers, and gymnasts to unlock their range of motion faster and more safely than static stretching alone.
Shipped fast to Sydney, Melbourne, Brisbane, and Adelaide — order before 2pm for same-day dispatch from our Sydney warehouse.
Who Is This For?
Key Features
- ✅ 3-bar adjustable design — extends smoothly from 55cm to 105cm for a customised stretch at every level.
- ✅ Professional stainless steel frame — rustproof, gym-grade construction that won't flex or buckle under load.
- ✅ EVA foam grips — soft, non-slip comfort on the centre handle and foot bars for full control.
- ✅ Lightweight at just 800g — take it to the studio, gym, or pack it for travel without added bulk.
- ✅ No tools or assembly required — extends and locks into position in seconds.
- ✅ 12-month manufacturer warranty — backed by 24/7 Gym Equipment's Australian support team.
Specifications
| Product Name | 3 Bar Adjustable Leg Stretcher |
|---|---|
| Material | Stainless steel frame, EVA foam grips |
| Adjustable Length | 55cm – 105cm (21.6in – 41.3in) |
| Weight | 800g |
| Colour | Silver / Black |
| Assembly Required | No — tool-free, extends and locks |
| Warranty | 12 months — defects & workmanship |
| Ships From | Sydney, Australia |
| Condition | Brand new |
How to Use the 3 Bar Leg Stretcher
Using the leg stretcher takes under 60 seconds to set up and requires no experience:
- Set the width — adjust the bars to a comfortable starting position (beginners: start short).
- Sit on the floor — place each foot on the outer foot bars, seated upright.
- Grip the centre handle — hold it firmly with both hands for stability.
- Push outward slowly — extend the bars to feel a gentle stretch through the hamstrings, hip flexors, and inner thighs.
- Hold for 20–30 seconds — breathe steadily and relax into the stretch.
- Increase gradually — over days and weeks, push a little further to build flexibility progressively.
Best used during warm-ups, cool-downs, or dedicated flexibility sessions. Consistent daily use for 4–6 weeks typically shows measurable improvement in split depth.
Pros & Cons
✅ Pros
- Rust-proof stainless steel built for long-term use
- Measurable flexibility gains for splits, kicks & poses
- Works for beginners through to advanced athletes
- Lightweight and travel-friendly at 800g
- No assembly — ready to use out of the box
- Backed by a 12-month Australian warranty
⚠️ Things to Note
- Requires consistent practice for best results — not instant
- Not recommended for users with recent lower-body injuries
- A spotter or wall support recommended for first-time users
Why Buy From 24/7 Gym Equipment?
24/7 Gym Equipment is an Australian-owned fitness equipment retailer shipping from a Sydney warehouse to customers across Sydney, Melbourne, Brisbane, and Adelaide. Every product comes with a 12-month manufacturer warranty, and our local support team is available if you ever need assistance. We stock gym equipment trusted by home users, personal trainers, martial arts schools, dance studios, and gymnastics clubs across Australia.
Frequently Bought Together
Pair your leg stretcher with these complementary training tools from 24/7 Gym Equipment:
- Resistance Bands — for hip flexor activation and warm-up
- Ab Wheels & Core Trainers — strengthen the core that supports your splits
Frequently Asked Questions
A 3 bar leg stretcher is used to improve lower body flexibility — specifically the hamstrings, hip flexors, groin, and inner thighs. It is commonly used by martial artists working toward high kicks, dancers and gymnasts training for splits, and yoga practitioners improving their hip mobility. Yes. The adjustable range (55cm–105cm) means you start at a comfortable width and increase gradually. Beginners should start at the shorter end, hold each stretch for 20–30 seconds, and increase the extension week by week as flexibility improves. Most users notice improved flexibility within 2–4 weeks of daily use. Achieving full splits typically takes 6–12 weeks of consistent training, depending on your starting flexibility, age, and training frequency. Common exercises include: split stretches, inner thigh and groin stretches, hamstring lengthening, hip flexor openers, and seated abductor stretches. It is used across martial arts, yoga, pilates, gymnastics, and dance training. No tools or assembly are required. The 3-bar system extends and locks into place manually in seconds. It is ready to use straight out of the box. The leg stretcher adjusts from 55cm to 105cm (21.6 inches to 41.3 inches), making it suitable for users of all heights and flexibility levels. Yes. All products from 24/7 Gym Equipment include a 12-month manufacturer warranty covering defects and workmanship. Contact our Australian support team if you experience any issues. We ship Australia-wide from our Sydney warehouse. Orders placed before 2pm on business days are typically dispatched same day. Delivery times vary by location — Sydney and Melbourne customers generally receive orders within 1–3 business days. Yes, it is designed for safe home use. Always warm up before stretching, start at a comfortable width, never force the stretch to the point of sharp pain, and for your first few sessions, use a wall or have someone nearby for balance support.What is a 3 bar leg stretcher used for?
Is the 3 Bar Leg Stretcher suitable for beginners?
How long does it take to see results from using a leg stretcher?
What exercises can I do with this leg stretcher?
Does it require assembly or tools?
What is the adjustable length range?
Does it come with a warranty?
How fast is shipping in Australia?
Is this leg stretcher safe to use at home?
Join thousands of Australian athletes, dancers, and yoga practitioners who train smarter with the 3 Bar Leg Stretcher.
✅ In Stock | 🚚 Fast Shipping |
⚡ Order before 2pm for same-day dispatch from our Sydney warehouse.


Commercial Adjustable B20 Warrior Bench
9 Backrest Positions | 3 Seat Positions | 800lb Rated Capacity
The Commercial Adjustable B20 Warrior Bench is built for gyms, PT studios and home setups that put an adjustable bench through daily use. With nine backrest positions and three seat positions, it moves easily between flat, incline and upright settings for dumbbell presses, shoulder presses, incline curls and seated work.
A common concern with adjustable benches is stability under load once the backrest is angled up. The B20 addresses this with a double triangular frame structure, a 75 x 3mm main steel tube and a double-supported backrest adjustment frame, giving it a stated maximum total capacity of 800lb (approximately 363kg).
Below you will find the full specifications, what is included, honest pros and cons, and everything you need to know before buying a commercial adjustable bench in Australia.
What Comes With Your Bench
Standout Features
What You Can Train On This Bench
Chest & Shoulders
- Flat dumbbell press
- Incline dumbbell press
- Seated shoulder press
- Incline dumbbell fly
- Seated lateral raise
Arms, Core & Seated Work
- Incline dumbbell curl
- Seated overhead tricep extension
- Seated dumbbell curl
- Upright seated core work
- Barbell bench press (paired with a rack)
12-Month Limited Warranty
Full Specifications
| Model | B20 (manufacturer reference: IBL-B2075S) |
| Product Type | Commercial adjustable bench (FID bench) |
| Backrest Positions | 9 positions, adjustable from 0° to 90° |
| Seat Positions | 3 positions |
| Maximum Total Capacity | 800lb, approximately 363kg (includes user and training load) |
| Maximum User Weight | 350lb, approximately 159kg |
| Main Frame | 75 x 3mm steel tube, double triangular frame structure |
| Backrest Adjustment | Double-supported adjustment frame with laser-cut stainless steel limiting plate |
| Assembled Length | Approximately 1,352mm (brochure diagram). Note: a separate reference in earlier sourcing listed 1,362mm; to confirm before publishing |
| Maximum Assembled Height | Approximately 1,340mm |
| Frame Footprint Width | Approximately 783mm |
| Backrest Pad Width | Approximately 200-280mm (tapered pad, exact placement to confirm) |
| Seat Pad Width | To confirm |
| Upholstery | Thickened commercial-style leather with 5mm plywood reinforcement and concealed binding |
| Frame Finish | Anti-static, wear-resistant powder coating |
| Mobility | Integrated roller-bearing transport wheels and horizontal aluminium-alloy handle |
| Floor Protection | Non-slip rubber floor pads on the base |
| Machine Weight | To confirm |
| Manufacturer | Qingdao Imbell Sporting Goods Co., Ltd. |
| Warranty | 12-month limited warranty against manufacturing defects and structural failure under normal intended use |
Pros and Cons
- 800lb rated total capacity suits heavier dumbbell and barbell work
- 9 backrest positions cover flat through to upright training
- Laser-cut stainless steel adjustment plate is enclosed for safer angle changes
- Double triangular frame is designed to improve stability under load
- Integrated transport wheels make it easier to reposition in a gym floor plan
- Thick commercial-grade upholstery with plywood-reinforced backrest
- Backed by a 12-month limited warranty against manufacturing defects and structural failure
- Backrest range is 0° to 90° only, there is no decline position
- As a commercial-grade steel unit it is heavier to lift up stairs, despite the wheels
- Seat pad width and total machine weight are not yet confirmed by the supplier
Who Is This Bench For
-
PT studios running back-to-back sessionsA heavy-duty frame built to handle frequent angle changes and client turnover.
-
Commercial gym ownersAn 800lb rated FID bench that fits alongside racks and dumbbell stations on a busy gym floor.
-
Serious home gym ownersHome lifters who want multiple incline options for dumbbell and barbell pressing.
-
School and sporting club gymsEquipment built for higher use than a typical home-grade folding bench.
-
Apartment and workplace gymsIntegrated transport wheels make it easier to move and store between sessions.
See It In The Showroom
Getting It To You
You May Also Need
Frequently Asked Questions

Leg Press Attachment
Turn your functional trainer or cable machine into a dedicated leg press station. Mounts directly to the XG90, XG75, XF10, and G6S — built for commercial use, installs in seconds.
Thick steel construction handles bilateral loading without flex or movement during use.
Centre cut-out provides secure foot placement and consistent heel position for every rep.
Locks into position on compatible machines in seconds — no bolts, no setup downtime.
Adds leg press function to an existing unit rather than requiring a second dedicated machine.
- Commercial gyms maximising floor space and equipment versatility
- Personal training studios running cable machine-based leg day programming
- Strength coaches adding bilateral leg press to a multi-function cable rig
- Home gym setups replacing a second machine with an attachment upgrade
| Material | Heavy-gauge steel, powder-coated matte black |
| Finish | Matte black powder coat |
| Compatible Models | XG90, XG75, XF10, G6S |
| Installation | Tool-free, mounts to machine crossbar |
| Warranty | 12 months parts & labour |
Questions before you order? Our team can confirm compatibility with your existing machine.
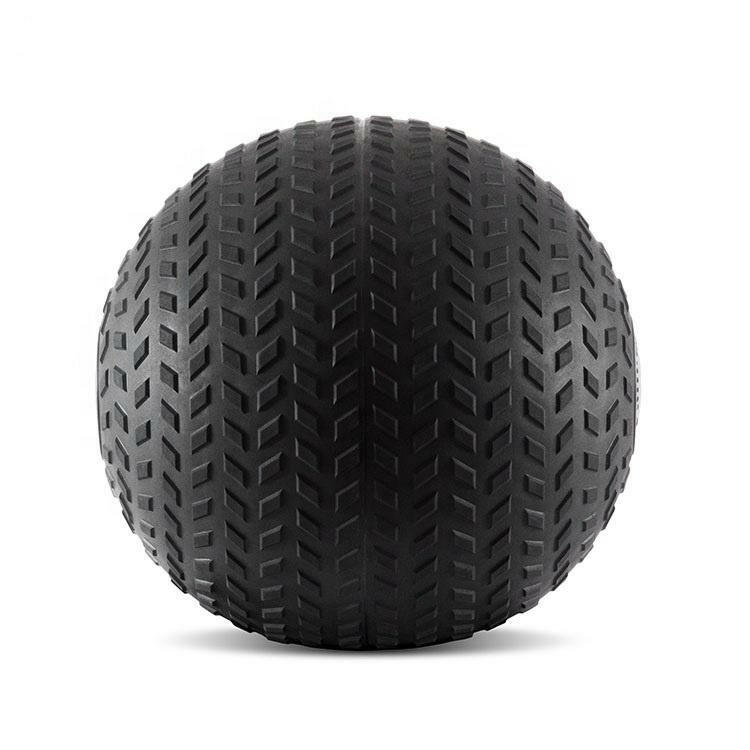


15KG Slam Ball – Heavy Duty Dead Ball with Non-Slip Grip for Power Training
15KG Slam Ball – Heavy Duty Dead Ball with Non-Slip Grip for Power Training
15KG Heavy-Duty Non-Slip Slam Ball – Advanced Strength & Muscle Building
Push your limits with the 15KG Heavy-Duty Slam Ball, built for elite strength training, muscle building, and power development. Perfect for athletes and advanced lifters, this slam ball delivers intense full-body conditioning and supports your journey toward building lean muscle and explosive strength.
Key Features
- Heavy-duty slam ball (15KG): Engineered for maximum load and impact resistance in commercial and high-intensity environments.
- Non-slip, high-grip PVC coating: Ensures solid handling during high-power movements like slams and tosses.
- Iron sand filling: Reduces bounce and roll, giving you control and safety during extreme workouts.
- Textured surface: Enhances grip during sweaty sessions, ideal for HIIT and circuit training.
- Durable construction: Built to withstand repeated high-force impacts on any training surface.
Performance Benefits
- Muscle building focus: Supports compound movement patterns essential for building muscle mass and strength.
- Targets key muscle groups: Strengthen your glutes, quads, hamstrings, calves, and core abdominals.
- Explosive strength and endurance: Ideal for building muscle while losing fat and developing stamina.
- Functional body conditioning: Improves coordination, stability, and posture through dynamic movement.
Ideal For
- High-performance athletes and strength coaches
- Individuals on a muscle building program or muscle building diet
- Those building muscle after 50 or during body recomposition
- Users looking to integrate torso building and leg building exercises
- Fitness-focused vegetarians exploring high protein vegetarian meals for muscle building
Whether you're training for performance, conditioning, or physique, the 15KG Heavy-Duty Slam Ball is your tool for next-level muscle building and power training. Add it to your home gym or facility and unlock real results.
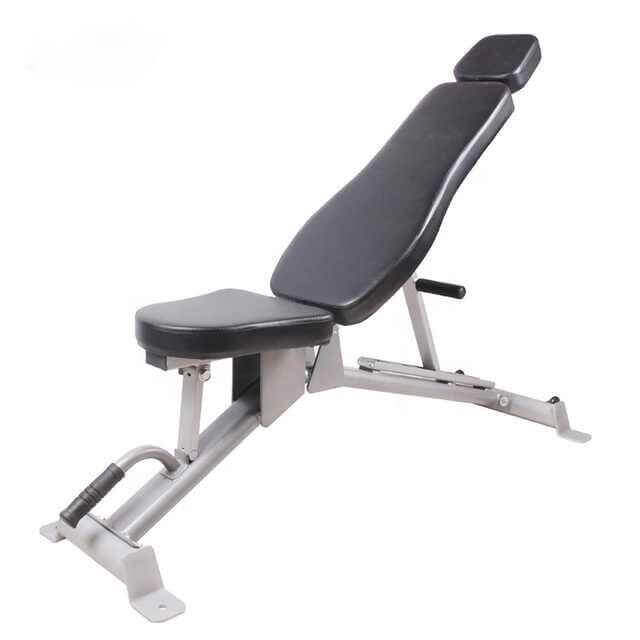
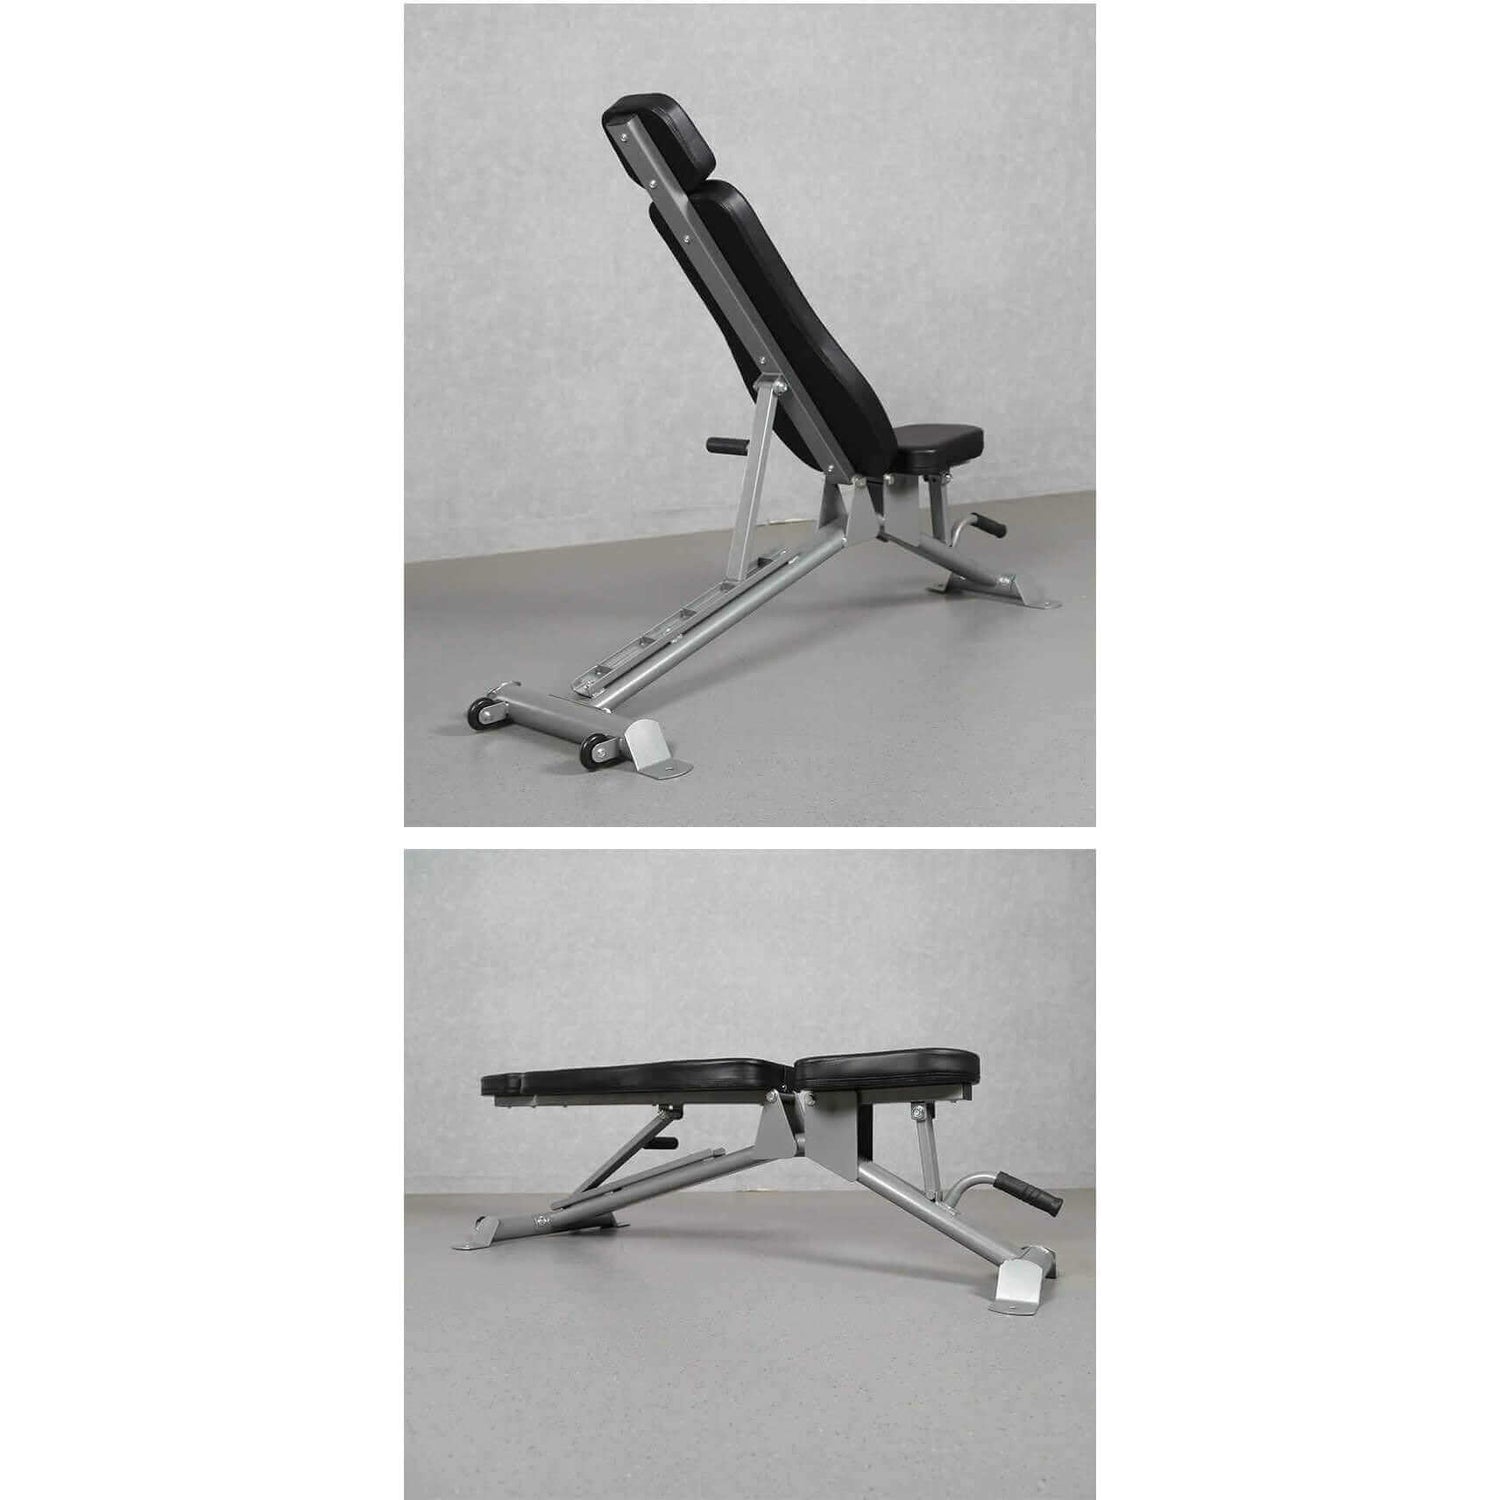
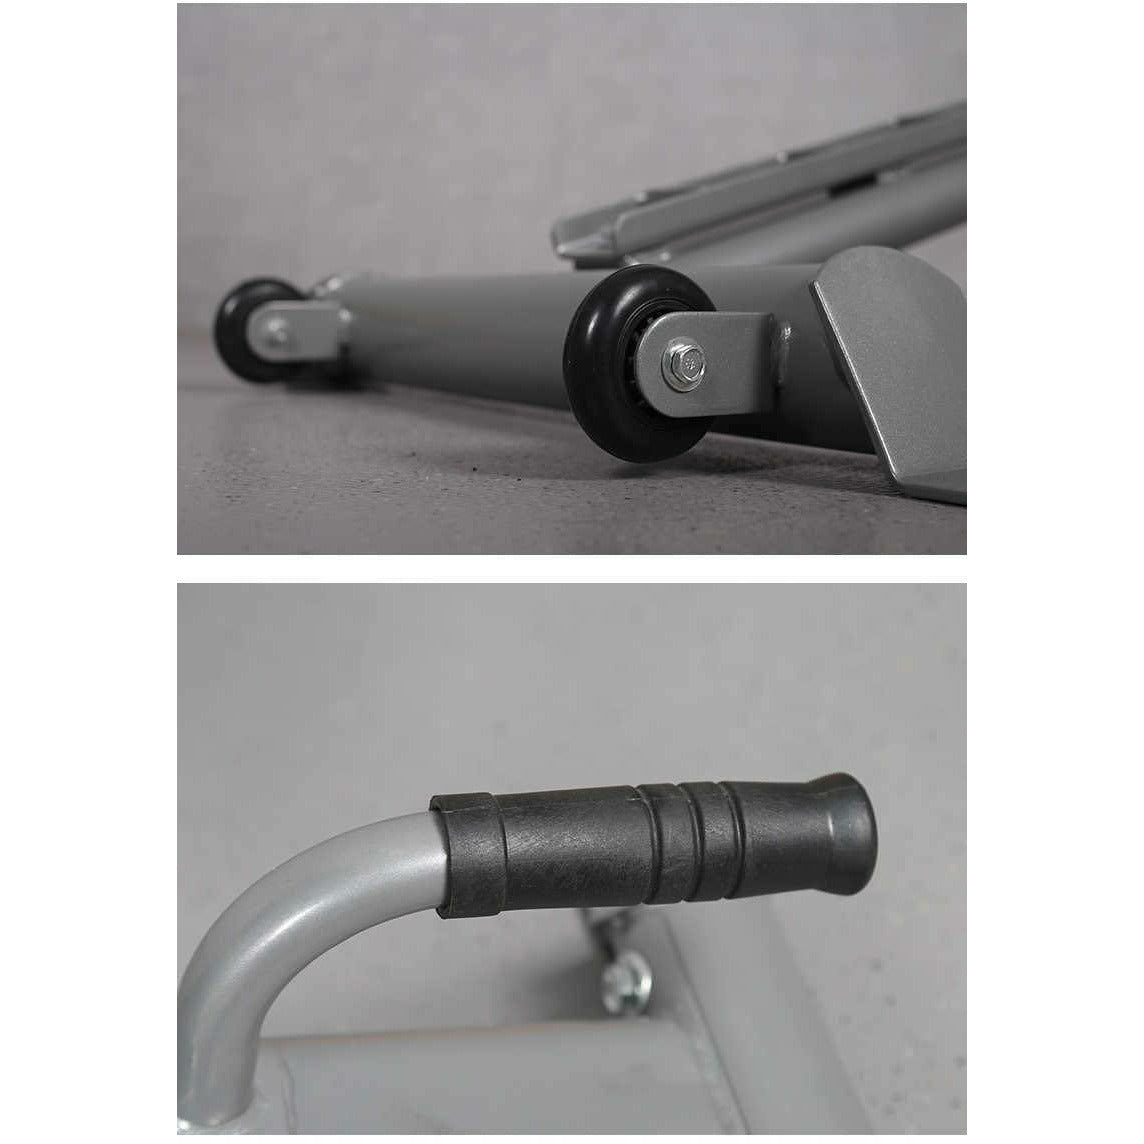
Adjustable FID Weight Bench Flat, Incline and Decline Bench | 250kg Rated | Australia
The Adjustable FID Weight Bench is a commercial-grade flat, incline and decline bench built for home gyms, PT studios and commercial facilities across Australia. With 6 adjustable backrest positions and a 250kg total load rating, it covers bench press, dumbbell shoulder press, incline flies, dumbbell rows and ab work from one piece of equipment.
If you are comparing adjustable weight benches for sale in Australia, the heavier 60x80x2mm steel frame on this model is built to a commercial standard rather than a typical home gym specification, so it holds up to daily, high-frequency training rather than occasional use.
What Comes With Your Bench
Built for Every Pressing Angle
Build Quality You Can Rely On
6 Positions, Every Training Angle
Exercise Reference
Chest
- Flat dumbbell bench press
- Incline dumbbell bench press
- Decline bench press
- Incline dumbbell flies
- Flat dumbbell flies
Shoulders and Arms
- Seated dumbbell shoulder press
- Seated lateral raise
- Incline dumbbell curl
- Lying tricep extension
- Arnold press
Back and Core
- Single-arm dumbbell row
- Incline dumbbell row
- Decline ab crunches
- Decline sit-ups
- Dumbbell pullover
Legs and Functional
- Bulgarian split squat
- Step-ups
- Hip thrusts
- Feet-elevated plank
- Dumbbell Romanian deadlift
Technical Details
| Bench Type | FID, flat, incline and decline adjustable weight bench |
| Load Rating | 250kg total (user plus load) |
| Backrest Positions | 6, decline, flat, low incline, mid incline, high incline, upright |
| Frame | 60 x 80 x 2mm commercial-grade steel |
| Dimensions | 387mm (W) x 1565mm (L) x 425mm (H) |
| Padding | High-density foam with upholstered cover |
| Foot Guards | Non-slip rubber |
| Mobility | Integrated transport wheels |
| Frame Finish | To confirm |
| Frame Colour | To confirm |
| Frame Warranty | 6 months |
| Upholstery Warranty | 6 months |
| Assembly | Ships fully assembled |
Pros and Cons
- 250kg load rating suits advanced lifters and commercial use
- 6 adjustable positions from decline through to upright
- 60x80x2mm steel frame is heavier than most consumer benches
- High-density padding holds firm under heavy pressing
- Transport wheels make repositioning easy
- Non-slip foot guards keep the bench stable on most floor types
- Not foldable, so it needs a dedicated spot in your gym
- No leg developer attachment on this model
- Frame finish and colour are still to be confirmed for this listing
The Right Bench For
- Home gym owners who want one bench that does everythingThe 6-position adjustment range replaces a separate flat bench, incline bench and seated press station
- PT studios and commercial gymsThe 250kg rating and commercial steel frame are built for daily, high-frequency use across multiple clients
- Dumbbell-focused trainersAn adjustable FID bench is the natural partner to a dumbbell rack, and this one is built to handle the full load range
- Buyers comparing adjustable benches for sale in AustraliaThe 60x80mm frame and 250kg rating sit above most standard consumer benches at this price point
- Lifters who train upper chest and shoulders heavilyThe high incline and upright positions target these areas in ways a flat-only bench cannot
- Anyone building their first serious home gymAlongside a dumbbell set and a rack, a quality adjustable bench is one of the highest-priority purchases in a strength-focused setup
Who should not buy this: if you need a foldable bench for a small space with limited storage, this is not the right fit, as the frame is fixed rather than collapsible. If you are after a bench with a built-in leg developer or preacher curl attachment, you will need a different model. And if your training is centred entirely around barbell work with a power rack, a flat utility bench may suit your setup better than a full FID bench.
See It In Person
Getting It To Your Gym
Complete Your Setup
Common Questions


Multi-Function Lat Seat Attachment — Adjustable Lat Pulldown & Seated Row Station
Multi-Function Lat Seat Attachment — Adjustable Lat Pulldown & Seated Row Station
Multi-Function Lat Seat Attachment — Adjustable Lat Pulldown & Seated Row Station 7-Level Angle · 13-Level Height · Foam Rollers · Commercial Grade | XG90 & XG75 (G25) | Australia
The Multi-Function Lat Seat Attachment transforms your XG90 or XG75 (G25) into a complete dedicated lat pulldown and seated cable row station — the same braced seating experience as a standalone commercial lat machine. Featuring a 7-level angle-adjustable thigh roller and 13-level height-adjustable seat, the attachment configures precisely to each user's body proportions. High-density foam rollers lock the thighs securely during overhead pulls while commercial-grade diamond-pattern leather delivers durability for heavy daily use. Finished with a stainless steel adjustment plate for precise, stable positioning — no flex, no movement mid-set.
Performing lat pulldowns on a functional trainer without a braced seat means there is nothing holding you down when you pull the bar — your body rises to meet the bar rather than the bar travelling down to you. The thigh rollers on this seat lock your legs under the pad, keeping you planted in the seat under maximum load. The result is genuine lat pulldown mechanics — the same physics that make standalone lat machines so effective — now built into your XG90 or XG75 setup.
Configures to Every User — 20 Possible Positions
Commercial-Grade From Pad to Frame
Everything That Makes It Work
Exercise Reference
Lat Pulldowns — Overhead Pulling
- Wide-grip lat pulldown — aluminium bar
- Standard-grip lat pulldown
- Close-grip lat pulldown — V-bar triangle
- Reverse-grip supinated pulldown
- Single-arm lat pulldown — stirrup handle
- Straight-arm pulldown (standing variation)
Seated Cable Rows — Horizontal Pulling
- Seated cable row — neutral grip (V-bar)
- Seated wide-grip cable row — long bar
- Seated single-arm cable row
- High-elbow seated row — upper back focus
- Seated face pull — rope attachment
- Seated cable bicep curl — straight/cambered bar
Latissimus dorsi (back width & thickness) · Rhomboids (mid-back retraction) · Teres major · Rear deltoids · Biceps brachii · Brachialis · Erector spinae (postural stability) · Core (isometric bracing)
Technical Details
| Attachment Type | Multi-function lat pulldown & seated row seat — adjustable |
| Compatible Machines | XG90 Commercial Gym Station · XG75 (G25) All-in-One |
| Mount Type | Direct frame connection — existing hardware points, no drilling required |
| Angle Adjustment | 7 levels — thigh roller angle |
| Height Adjustment | 13 levels — seat height |
| Thigh Rollers | High-density foam — padded anti-lift bracing |
| Upholstery | Commercial-grade diamond-pattern leather — seat and pad surfaces |
| Adjustment Mechanism | Stainless steel adjustment plate — rattle-free, corrosion-resistant |
| Dimensions | 504 × 662–810 × 389–588 mm (varies with height setting) |
| Net Weight | 15.5 kg |
| Primary Use | Lat pulldowns · Seated cable rows · Ground-based cable pulling movements |
| Sold As | Optional add-on — not included with XG90 or XG75 as standard |
| Delivery | Australia-wide — Sydney, Melbourne, Brisbane, Adelaide, Perth & regional |
The Right Add-On For
- Back-focused athletes and bodybuilders — the thigh-roller braced seated position is the correct setup for maximum lat pulldown loading; this is the attachment that makes heavy lat work genuinely effective on a functional trainer
- PT studios servicing clients of varying heights — 7-level angle and 13-level height adjustment means the seat can be correctly configured for any client body proportion quickly between sessions
- XG90 and XG75 owners completing their setup — the machine's overhead cable is already there; this seat adds the braced seated position that unlocks proper lat pulldown mechanics and heavy row loading
- Commercial gyms and school facilities — commercial diamond leather and stainless steel adjustment mechanism are rated for daily heavy use by multiple users — not a home gym accessory repurposed for commercial environments
- Rehabilitation and corrective training — precise height and angle adjustment supports correct seated posture for clients rebuilding posterior chain strength under clinical guidance
- Anyone who already owns the standalone Lat Pulldown Overhead Attachment — the overhead pulley arm + this seat together create a complete dedicated lat pulldown station on your XG90 or XG75
Common Questions
Frequently Bought Together
Sydney (NSW) · Parramatta · Bankstown · Liverpool · Penrith · Blacktown · Campbelltown · Bondi · Chatswood · Castle Hill · Northern Beaches · Manly · North Sydney · Mosman · Inner West · Sutherland Shire · Lower North Shore · Eastern Suburbs · Ryde · Melbourne (VIC) · Richmond · Brunswick · Essendon · Frankston · Dandenong · Geelong · Ballarat · Brisbane (QLD) · Fortitude Valley · Gold Coast · Sunshine Coast · Toowoomba · Rockhampton · Cairns · Adelaide (SA) · Glenelg · Norwood · Perth (WA) · Canberra (ACT) · Wollongong (NSW) · Newcastle (NSW) · Hobart (TAS) · Darwin (NT)

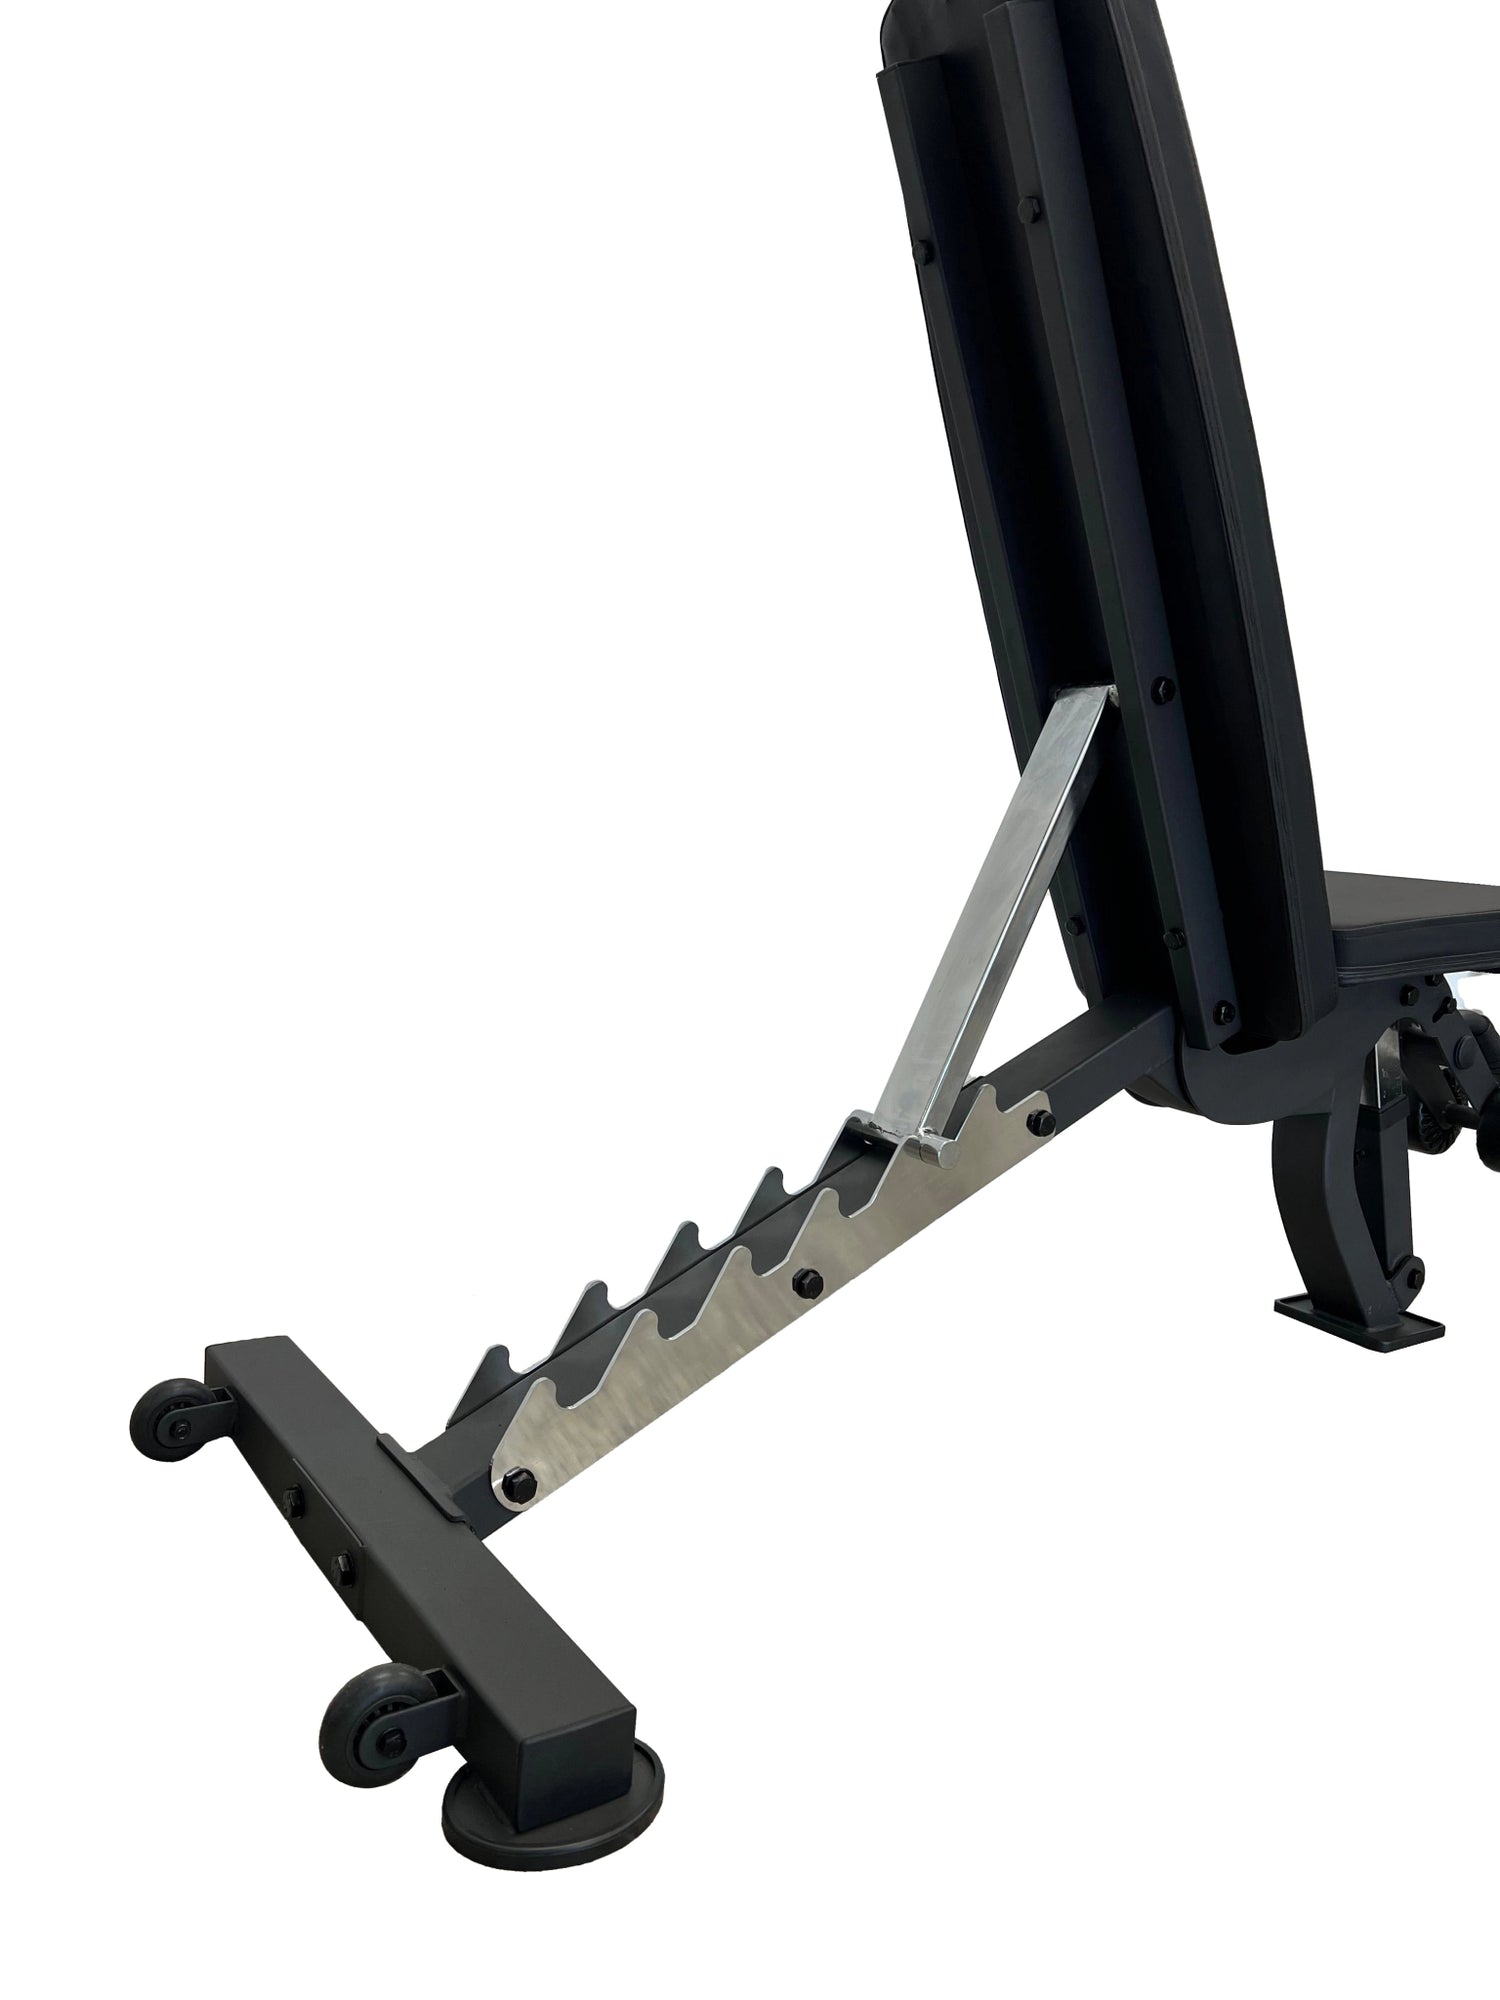
Commercial Adjustable FID Weight Bench | 320KG Rated |
Looking for a commercial adjustable weight bench in Australia? This 320KG-rated FID bench is designed for serious lifters, PT studios and commercial gyms. Built for stability, durability and full-range training, it replaces multiple benches in one compact unit.
The Commercial Adjustable FID Weight Bench is a commercial heavy-duty flat incline decline bench built for serious lifters and professional facilities across Australia. With a 320KG total load rating, 6 adjustable backrest positions and a commercial-grade powder-coated steel frame, it covers every angle needed for bench press, incline dumbbell press, dumbbell shoulder press, incline flies, dumbbell rows and decline ab work. One of the highest-rated commercial adjustable benches for sale in Australia — built for daily use in PT studios, commercial gyms, CrossFit boxes and serious home setups.
Most adjustable gym benches in Australia are rated to 250KG. This commercial FID bench steps up to 320KG — covering elite-level lifters, PT clients of all sizes and commercial environments where the bench is in use all day. That extra 70KG of rated capacity isn't a marketing number; it reflects heavier steel, tighter welds and a frame built to outlast the alternatives.
Commercial FID Bench vs Standard FID Bench — What's the Difference?
6 Positions — Every Training Angle
Commercial Build. No Compromises.
Exercise Reference
Chest — Press & Fly
- Flat dumbbell bench press
- Incline dumbbell bench press
- Decline bench press
- Incline dumbbell flies
- Flat dumbbell flies
- Dumbbell pullover
Shoulders & Arms
- Seated dumbbell shoulder press
- Arnold press
- Seated lateral raise
- Incline dumbbell curl (bicep stretch)
- Lying dumbbell tricep extension
- Seated overhead tricep extension
Back & Core
- Single-arm dumbbell row
- Incline dumbbell row
- Decline sit-up (ab crunches)
- Reverse crunch (decline)
- Decline leg raise
- Incline dumbbell reverse fly
Legs & Functional
- Bulgarian split squat (rear foot elevated)
- Step-up (bench as elevated platform)
- Hip thrust (bench as support)
- Incline plank (feet elevated)
- Dumbbell Romanian deadlift
- Seated dumbbell calf raise
Pros & Cons
- 320KG load rating — among the highest for adjustable benches in Australia
- 6 positions — full range from decline to upright seated
- Commercial steel frame — built for daily multi-user high-frequency use
- Larger 147cm × 69cm frame — more stable than standard consumer benches
- High-density padding holds firm under maximum dumbbell loading
- Powder-coat finish — corrosion resistant in all Australian conditions
- Covers every pressing and pulling movement pattern in one bench
- Suitable for PT studios, commercial gyms and serious home setups
- Larger footprint than compact consumer benches — requires dedicated floor space
- 40KG bench weight makes it heavier to move between rooms
- Commercial spec means higher price than entry-level adjustable benches
Technical Details
| Bench Type | Commercial FID — Flat, Incline and Decline adjustable weight bench |
| Load Capacity | 320KG total (user + load combined) |
| Bench Weight | 40KG |
| Backrest Positions | 6 — decline · flat · low incline · mid incline · high incline · upright seated |
| Dimensions | 147cm (L) × 69cm (W) × 45cm (H) |
| Frame Material | Commercial-grade steel — powder-coat finish |
| Padding | High-density ergonomic foam with upholstered cover |
| Best For | PT studios · commercial gyms · CrossFit boxes · home gyms · strength facilities |
| Delivery | Australia-wide — Sydney, Melbourne, Brisbane, Adelaide, Perth & regional |
The Right Bench For
- PT studios and commercial gyms — the 320KG rating and commercial frame handle daily high-frequency multi-user loading that standard consumer benches are not built to sustain
- Serious home gym lifters who want commercial-grade equipment — if you're pressing heavy dumbbells regularly, this bench's frame spec and load rating provide confidence that a lighter bench cannot
- CrossFit boxes and strength and conditioning facilities — the durability and versatility of a 6-position FID bench makes it a daily-use essential in group training environments
- Buyers comparing commercial adjustable benches for sale in Australia — the 320KG rating, commercial steel spec and larger frame dimensions place this bench in a different category to most adjustable benches at this price point
- Dumbbell-focused athletes targeting upper chest and shoulders — incline dumbbell press, incline flies and seated shoulder press all require a stable adjustable bench at specific angles; this bench covers all of them
- Coaches and trainers setting up new studio fitouts — a commercial FID bench is the highest-priority equipment purchase after a dumbbell set for any PT-focused training space
Common Questions
Complete Your Setup
Milperra NSW 2214
Saturday: 9am–1pm
💬 WhatsApp: +61 412 029 000
✉️ sales@247gymequipment.com.au
Sydney (NSW) · Melbourne (VIC) · Brisbane (QLD) · Canberra (ACT) · Wollongong (NSW) · Newcastle (NSW)
24/7 GYM EQUIPMENT COMPLETE CARE, MAINTENANCE a...
on Jun 13 2023
Gym Equipment Installation Safety Guide Austral...
on May 01 2025
Showing 20/177